You can even make a welding machine or a power-saw bench yourself, but when you need to make a device with your own hands that will be used in everyday life, ensuring the safe operation of the product comes to the fore.

Homemade water heater
A home-made water heater will be used by all family members who can have only distant ideas about electrical resistance, voltage and current strength. To minimize the likelihood of an accident, you will need to make the device in accordance with all the rules of electrical safety.
DIY water heater: choose the type of device
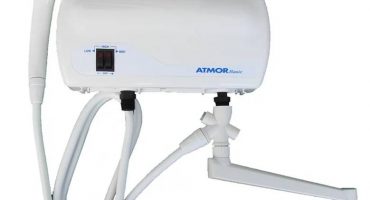
Despite the fact that at home, a storage device is much easier to manufacture, you should, first of all, consider the assembly option instantaneous water heater. Such household appliances will instantly heat the water, and electricity will be consumed only when the device is turned on. Unlike boilers, installation of a flowing device does not require a lot of space, nor does it need to do thermal insulation of the device.
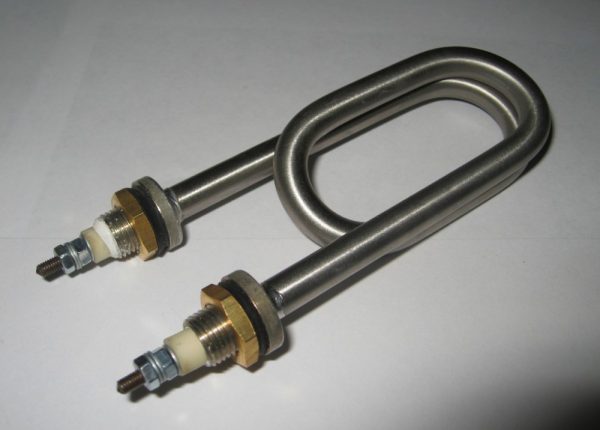
For heating water in both versions, a heater is used, but for the manufacture of a flowing device, a more powerful element will need to be purchased.
Powerful water heater
Of the additional details can not do without the use of RCDs. This device will automatically disconnect the contacts if an electric leakage occurs. You should also stock up with large copper wires and tools for work.
DIY instantaneous water heater
For the manufacture of instantaneous water heater should prepare the necessary tools:
- Welding machine (inverter).
- Electrodes
- Grinder with a nozzle for removing rust.
- Hammer.
- Drill with a set of drill bits for metal.
- Kern.
For a flow-through version of a water heater, the following materials will be needed:
- Steel pipe, the length and diameter of which slightly exceed the width and length of the heater.
- TEN electric water power 4 kW.
- Sheet steel 3 mm thick.
- Corrosion-resistant paint.
- Bolt and nut M14.
When everything you need is cooked, you can begin to manufacture the device. The first thing to do is to thoroughly clean the metal surfaces from rust. To do this, use a grinder with a nozzle.
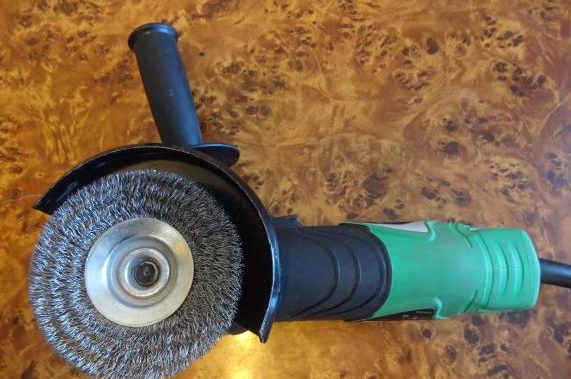
Grinder with rust remover
Then a rectangle is cut from the metal sheet, the minimum side of which should slightly exceed the outer diameter of the metal pipe. On a cut-off metal sheet, 2 holes are made with a drill, the diameter of which must be 1 mm greater than the thickness of the foot of the heater. To position the holes at the required distance from each other, lower the ends of the contact rods in white paint and then lean the ends of the contacts to the plate, trying to make the marks equally spaced from the side faces of the plate. When the paint dries a little, it is necessary to drill metal on white dots.
At the next stage, the plate thus prepared should be welded to the end of the pipe. Before performing this operation, the part must be grabbed lightly so that the holes made earlier are exactly in the middle. After the side plug is welded, the metal protruding beyond the outer diameter of the pipe is cut off with a grinder or gas cutter.
Further, having marked with a core at a distance of 20 mm 2 points that must necessarily be on the same line, holes with a diameter of 19 mm are made with a drill. These holes are necessary for welding threaded pipe sections to connect the water supply and remove heated fluid.
Given the need for grounding, it is imperative to weld an elongated M14 nut to the pipe, to which a conductor will be connected using a bolt.
In the next step, the electric heating element should be placed inside the pipe. The legs of the device should be carefully installed in the previously made holes, then tighten the fastening nuts with sufficient force. When installing the heater, be sure to put the rubber washers on the threaded part of the legs.
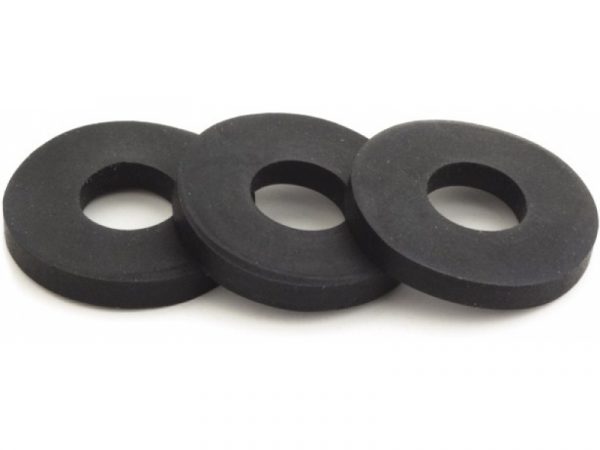
Sealing washers for TENA
Washers should be installed on the inside and outside of the device, and for greater reliability, apply a high-temperature sealant to the surface of the gaskets.
Then the opposite end of the metal pipe should be hermetically sealed. For this purpose, a square piece of sheet steel should also be cut. The side of the square must be at least 50 mm larger than the outside diameter of the pipe. For a reliable connection of the device with the plate, it must be laid on a flat surface, then installed exactly in the middle of the square, the device turned upside down by the TEN legs in such a way that the device nozzles are located strictly perpendicular to any of the faces of the lower square and gently weld the metal, trying not to overheat the improvised water heater too much.
When the device has completely cooled down, it is also installed upside down on a wooden board and 4 holes are made in the corners of the lower plate with a 10 mm drill. Holes are needed to mount a makeshift device to the wall.
Before installing the instantaneous water heater, its performance must be checked. For this purpose, you must connect the electric cable to the threaded contact of the heater, fill in the device, sufficient to fill the entire space, the amount of water and connect the device to the network.
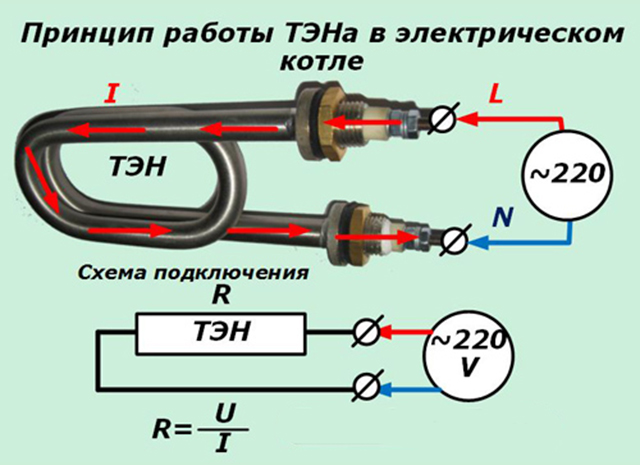
TEN connection diagram
As soon as the water in the device boils, it should be de-energized. If there are no leaks, then a home-made heater should be painted in any color with a high-temperature paint for metal. Before carrying out this operation, pour water out of it, degrease the surface with a solvent, and paint the device using a spray gun.
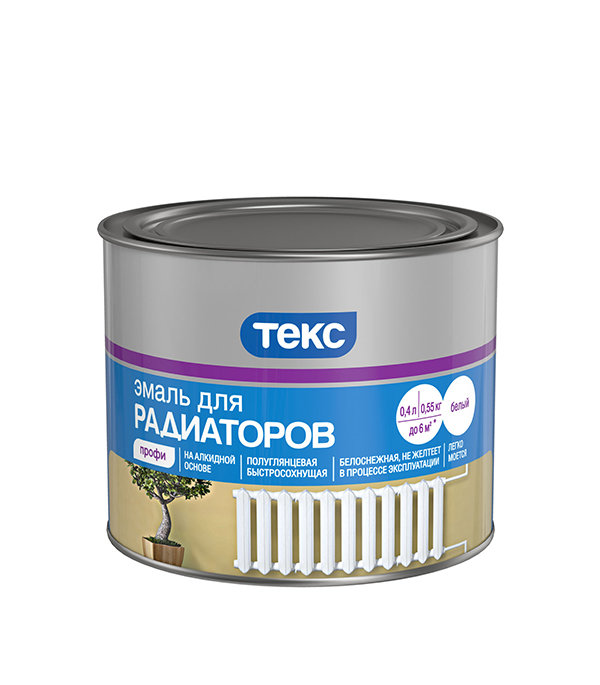
Paint for radiators
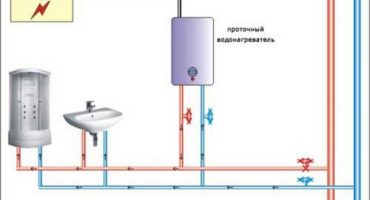
When the paint dries, you can proceed to install the device in the plumbing system. To do this, install the device at an equal distance from the points of fluid sampling, and with the device facing upwards, attach it to the wall. For this purpose, you must first make 4 holes in a vertical surface. Using anchor bolts, a home-made electric heater is attached to the wall from the side of the plate in which special holes were made for this.
After the device is firmly fixed, a flexible hose with cold water is connected to one of the pipes from the water supply network, and the other is connected to the hot water circuit.
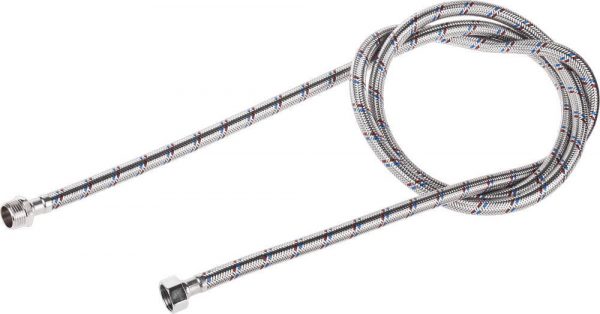
Flexible hot water hose
Then, water is supplied to the device and the water heater is tested for leakage by tap pressure. If no leaks are detected, then electricity should be connected to the home-made device.
Given the high power of the device, it is not recommended to use a standard plug to turn on the device. For the water heater, a separate electrical circuit should be allocated from the incoming electrical panel. You should also install an additional 20 A automatic fuse, which should be in an accessible place, to turn on the device when necessary.
When using a heater of this design, it will be very inconvenient to turn on the device with the help of a knife switch each time. For more comfortable use of the device, it is recommended to install a pressure switch in the water supply circuit after the heating device. And put a check valve in front of the water heater so that in the absence of water in the water supply, the heater will not turn on automatically. When using such a scheme, water heating will be carried out only at that moment when the tap is open.
To automatically turn on the device, you can set thermostat directly into the water heater, but the installation of such a system must be done at the stage of manufacture of the device. The disadvantage of a water heating system with a built-in thermostat is that the device will work in heater mode, giving off some of the heat to the surrounding air. Losses can be reduced by covering the device with a heat insulator that is resistant to high temperatures. Despite the more complex design of such a system, the main difference from a device with a pressure sensor installed will be an instant supply of hot water when the tap is opened. Significant disadvantages include a greater consumption of electricity due to the more frequent inclusion of heating elements.
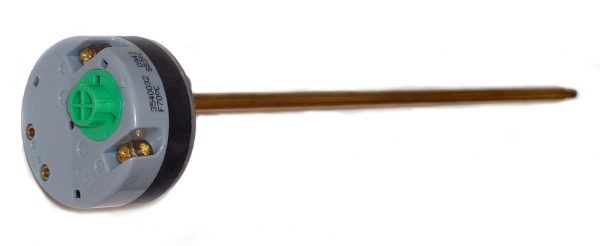
Thermostat for heating elements
Regardless of the type of system used, turning on the device, it is necessary to install a safety valve in the immediate vicinity of the heating device. During operation of the water heater, sticking of the relay or thermostat contacts may occur. In this case, the heating element will be constantly on, which will lead to boiling of water and the appearance of high pressure in the system, which can lead to depressurization of the most vulnerable sections of the water supply. The safety valve will reduce the pressure. Upon reaching the critical value of this indicator, the locking mechanism will open and part of the liquid will be removed to the sewer system.
Collected The electrical circuit itself must also have safety devices and mechanisms. Most often, to prevent electric shock, RCDs are installed that instantly turn off the power supply when an electric leak occurs to the housing. RCD is recommended, as well as the machine, to be installed only in the electric circuit of the water heater.
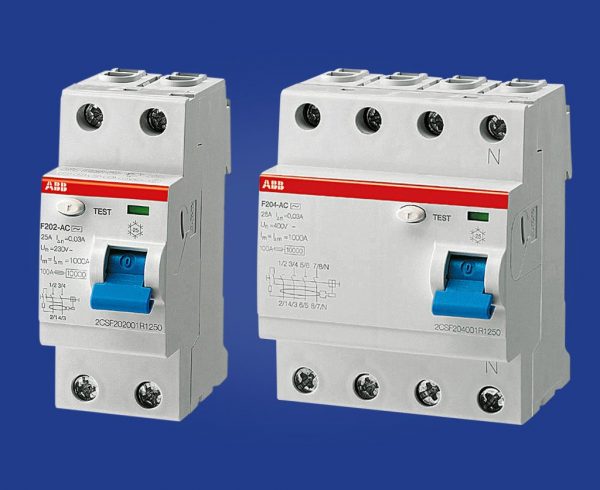
RCD
This device will reliably protect people from the effects of electric current even in the absence of a connected grounding conductor, but in order to increase efficiency, it is recommended to connect the device to ground. To do this, just connect the conductor from the home grounding system to the body of the water heater. Installation of the wire is carried out using a threaded connection to a nut that has previously been welded to a metal pipe.
If a home-made instantaneous electric water heater was manufactured according to the above instructions, then the result is a reliable device that will fully provide itself with hot water.
How to make a thermostat for a water heater yourself
If the budget is very limited in the manufacture of a water heater, then you can make a temperature controller for the water heater yourself. The thermal breaker is installed as follows:
- Remove from the faulty vehicle any brand of thermal relay that controls the inclusion of forced cooling of the engine.
- Set the thread type of this part.
- Choose a suitable metal tube in diameter and use a tap to cut the internal thread.
- Make a hole in the instantaneous water heater and weld the threaded pipe.
- Screw in the thermal relay, after applying the high-temperature sealant to the thread.
For the correct operation of the heating system, the heating element can not do without using an additional 12 V source and an intermediate relay. The relay installed in the system must be reverse acting, that is, open the circuit when low voltage is applied to the coil. This feature is connected with the fact that in a car the radiator blowing is switched on when a certain temperature value is exceeded, while the flow radiator must be turned off at the moment when the temperature value exceeds a critical value.
What can be done from the old Ariston heater
“Happy” owners of Ariston water heaters, after repeatedly replacing the heating element, decide to purchase and install a different brand of device. From the old device, an excellent version of a country shower is obtained, the water for which is heated by solar energy. To convert the device into a hot water tank, you must:
- To grill the external case of the device and remove it.
- To clear an internal tank of thermal insulation.
- Degrease the surface.
- Paint the tank in matt black with any metal paint.
- Install and connect the tank to the summer shower system.
Installation of the tank should be carried out at a height of at least 2.5 meters in an area open to sunlight. The most correct would be to install a water heater directly on the roof of a summer shower. The container should be installed in an upright position, and the water connection must be made to the drain pipe of the device, because, unlike the electric model, in the summer shower, water will be drained by gravity.
This version of the country shower is the simplest, if desired, it is possible to make a more complex design of the device that heats the liquid due to solar energy.
Country version of a water heater
In the country, you can make homemade solar water heaters. The disadvantage of such devices is only the lack of heating during cloudy weather. The solar water heater is made of the following materials and parts:
- The old fridge.
- Water tank.
- A metal-plastic pipe with a diameter of 16 mm.
- Edged boards 200 mm wide.
- A sheet of cellular polycarbonate.
- 3 mm thick steel sheet.
- Black metal paints.
You will also need to purchase supplies for fastening materials and various adapters for connecting pipes. In addition, you will need to buy a low-power circulation pump.
The manufacture of a solar-powered water heater can be done in the following sequence:
- The rear radiator is removed from the refrigerator, and the copper tube is cut off at the place where the device is connected to the compressor and the freezer. When performing this operation, it is necessary to save the original fasteners of the part.
- A rectangle is cut out of a metal sheet by a grinder, the length and width of which should be 20 cm more than the parameters of the radiator of the refrigerator.
- One of the sides of the metal rectangle is cleaned, degreased and painted black. It is also necessary to paint the radiator of the refrigerator.
- When the paint dries, place a copper grate on the painted surface of the metal sheet so that it is equidistant from its corners.
- On the painted surface of the metal sheet, with any sharp object, notches are made under the holes of the copper radiator.
- Then, at the marked points, it is necessary to drill holes whose diameter should correspond to the holes of the radiator mount.
- Along the perimeter of the metal sheet, it is also necessary to make holes with a diameter of 5 mm for attaching the side faces of the device. The distance between the holes should be about 100 mm.
- Adapters are soldered to the cut ends of copper pipes with a gas soldering iron for connecting metal-plastic pipes.
- From a board of 200 mm it is necessary to saw off pieces with a hacksaw. 2 segments should be equal to the width of the metal sheet, and the other two are 50 mm less than its length. After this, the wood must be treated with a protective compound.
- The pieces of the board are installed on the edge around the perimeter of the metal sheet and screwed on the wood with screws through previously made holes.
- A copper radiator is installed inside the “box”, which is bolted to the metal plate. Pipes with adapters for connecting a metal-plastic pipe should be removed through holes made with a feather drill in one of the side boards.
- From a sheet of transparent honeycomb polycarbonate cut a rectangle that will be equal to the size of the metal base.
- Screw the polycarbonate rectangle to the ends of the boards with screws with rubber washers.
- It is necessary to install a freezer removed from the refrigerator in the water tank, the adapters should also be soldered to the copper tubes of it. The freezer should be fixed in the lower part of the tank, and the pipes should be brought out to one of the side walls.
A self-made cottage water heater is installed as follows:
- The device is located in a sunny area.
- A tee is connected to one of the pipes of the water heater, to which a metal-plastic pipe and a crane are connected. Only a metal-plastic pipe should be connected to the second pipe.
- On the other hand, the pipes are connected to the nozzles exiting the water tank.
- It is also necessary to install a circulation pump in the system so that the coolant moves from the water heater to the water tank.
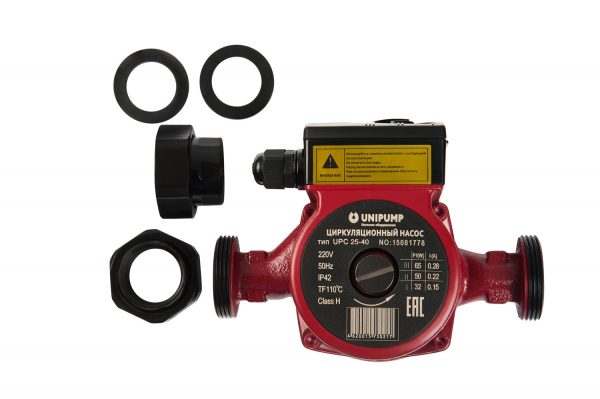
Circulation pump
- The system is filled with inexpensive engine oil through a water heater tap. To exclude the possibility of formation of air jams, the crane at this moment should be located at the highest point.
- The water heater is mounted on a tubular support as high as possible from the ground.
After connecting the pump to electricity, the oil will be heated by solar radiation, which will easily pass through the polycarbonate plate. Also, the greenhouse effect is formed in the device, which will allow using the device effectively even during variable cloud cover.
Heated oil will transfer heat to water in a tank with a freezer installed, so it should be insulated with foam. The intake of hot water can be forced using a pump or gravity, but for this you will need to install the tank as high as possible. In order that the heated oil on the way to the heat exchanger does not cool, the plastic pipes should be covered with foam throughout the entire length.
Making a home-made water heater will not only save money, but also gain invaluable experience in designing complex devices with your own hands. If you yourself need to make an electrode device, then you should definitely remember the safety precautions when handling devices operating on electricity.