If you have problems with a laptop, not everyone has the opportunity to contact a service center. There are times when they stop releasing batteries for various laptop models due to their obsolescence. In this case, the question arises - how to repair the laptop battery with your own hands?
When to repair
To know how to properly repair the battery, you need to know in which specific cases this is done. Those. First you need to study the structure of the battery. This will allow you to understand what is happening to her.
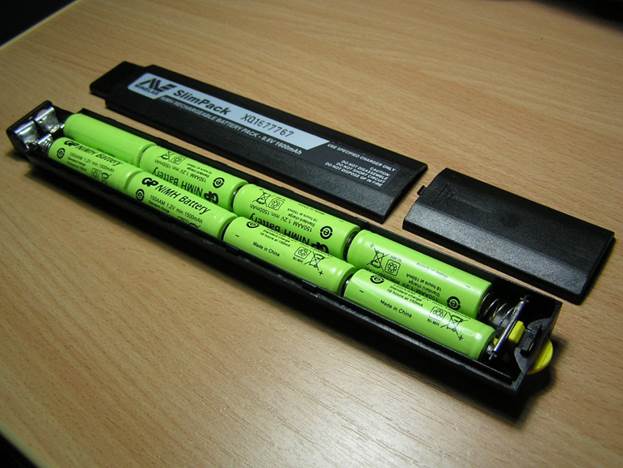
The internal structure of the battery
The battery consists of several elements. Most often, their number varies from 4 to 8. But sometimes there are batteries with fewer and more elements. Also included is a controller. It regulates the processes of charging and discharging these elements.
What situations require battery repair:
- Battery cells, which are lithium banks, have become unusable. One or more cans may fail. The operational state of the controller is preserved. Repair will be a replacement for these cans.
- Elements are deeply discharged. This suggests that the controller does not allow banks to charge. To fix the battery, you will need to charge each jar separately or use a special charger to balance the entire assembly.
- The controller or its individual elements have become unusable. To fix it, just replace the controller.
When replacing battery cells, new parts must have the same electrical characteristics.
Safely Remove
If you do not know how to safely remove the battery from the laptop, you can only aggravate the situation. Before starting the process, you need to make sure that the laptop is turned off and unplugged.
What to do next:
- Close the lid and turn the laptop over.
- On the bottom you can see various mounts. Usually screws are used for fastening. But now there are more and more models with latches. Removing the battery in this case is simple. You only need to understand which way the latches scroll. Screws are unscrewed with a screwdriver.
- Then it remains only to remove the battery.
It must be remembered that the battery should be removed carefully so as not to damage it.
There are laptop models without a removable battery. You can extract it, but you will have to work hard for this.

Removing a non-removable battery
Sequencing:
- First, the screws on the bottom of the case are loosened.
- After that, the cover of the laptop should be open.
- The cover with the keyboard must be opened and lifted up.
- To safely remove the battery, you need to disconnect the cable.
After all the manipulations have been done, you can unscrew the screws on the battery strip itself and remove it.
Necessary tools
What tools will be needed to repair the battery:
- screwdriver and knife for opening the case;
- multimeter;
- soldering iron, soldering acid and tin;
- insulating tape;
- glue;
- balance.
Also, do not forget about the new battery elements. As for lithium batteries, the best thing is that they are the same, only new.
Recovery process
The repair process involves several stages. Each stage should be carried out with great accuracy. Otherwise, there is a risk of damage to the cells so much that the battery can no longer be restored.
Battery Disassembly and Diagnostics
Disassembling the battery case is not as easy as disassembling the case of the laptop itself. Most batteries are bonded with glue. There are latched batteries. But this is rather an exception to the rule.
Opening the battery with latches is not difficult. Adhesive batteries are more difficult. First of all, such a battery needs to be slightly warmed up by glue seams, then tap on it with a hammer. Shots must be very weak. After that, use a knife or screwdriver to pry the battery along the seam and open it.
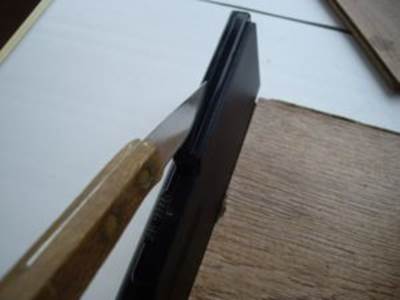
Opening the battery
If no damage was found during the opening, you can proceed to measure the voltage at the connector that connects to the laptop. Lack of voltage will indicate problems with the controller.
What to do in this case: unsolder one wire from the controller and connect the balancer. Before connecting to the device, you need to set the balancing mode.
If the problem persists, the problem banks will need to be replaced.
Battery Replacement
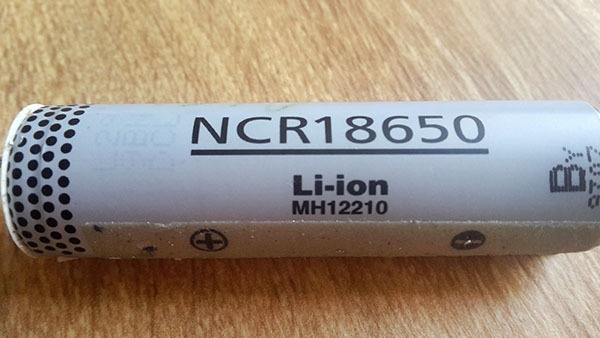
Before replacing, it is necessary to purchase new banks with the same parameters as in the original
Battery replacement is carried out differently depending on the type of battery. Therefore, before you start, you should draw a diagram of the internal structure of the battery.
Connection of new elements is carried out by simple soldering. Work should be carried out in a well-ventilated area.
Attention! Solder the wires to the banks quickly so that they do not overheat. If you don’t get the wire soldered in 2 seconds, you need to postpone the jar and continue working after it cools down.
In the end, it is imperative to remove the residual soldering acid. You can do this with a cotton swab dipped in alcohol.
After completion, you need to check the equality of voltage across all elements. The maximum allowable difference is a few hundredths of a Volt. In the opposite case, the voltage must be balanced using a balancer.
Battery assembly
You can proceed to assembly only if the voltage across all elements is balanced.
To connect the elements you need to use the old connecting bus if they were not damaged. If the old tires are not good, you can take copper foil. It should be 100-200 microns thick.
The assembly of elements is carried out according to the drawn scheme. Arrange the elements is also desirable as it was in the original.
Advice! When soldering cans, it is advisable to first connect them in pairs, and then connect the pairs together.
After completion, you need to solder the controller. Soldering is carried out from wires with lower potential to wires with higher potential.
When everything is ready, it remains only to glue or connect the housing using latches. If the casing cannot be glued, it is possible to connect its parts using electrical tape.
Calibration
It is not necessary to use programs for calibration. The capabilities of the operating system will be enough.
Walkthrough:
- In the section of the control panel, find "Power", then "Configure sleep mode".
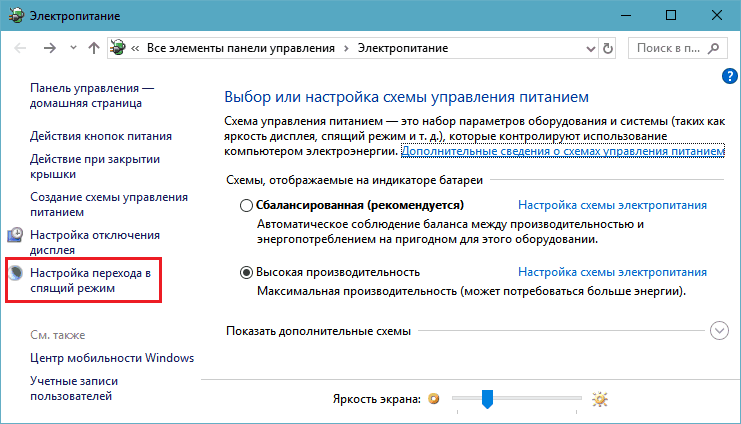
- Change advanced power settings.
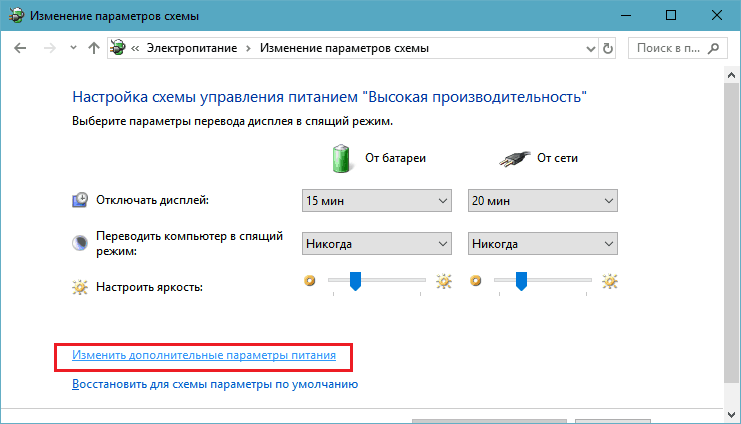
- In the section “Almost exhausted batteries”, select “From battery: hibernation”. In the section “Almost full battery discharge level”, select the lowest value.
The laptop must remain on until it runs out of power. Then shutdown will follow. It should take 5 hours before you can connect the power source. After connecting the power source, you need to charge the battery to 100%. The process should not be interrupted.