The kitchen is an important room in an apartment or house, so everything should be provided in it to ensure a comfortable cooking process. First of all, it is worth considering the arrangement of a gas stove and hoods. Of particular importance is the hood: it will eliminate all odors, as well as the sedimentation of fat, fumes, juices formed during cooking. Its normal functioning depends on the connection, for this reason it is important to know how to properly connect the hood to the ventilation in the kitchen. If you follow all the steps during this process, then further unpleasant odors will not spread to the entire room.
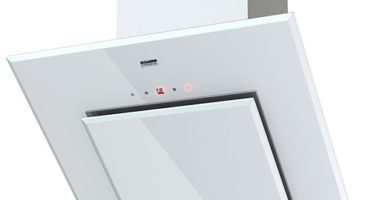
Ventilation hood
Surface preparation
The hood helps eliminate the unpleasant problems that usually arise during the cooking process: fat subsidence, evaporation, unpleasant persistent odors. She draws all the dirt into herself and takes it out. But the full functioning of the device depends on its proper installation.
Before installing the hood, you should think about its location in advance. Of course, it should be installed above the gas stove, but also do not forget to pay attention to the quality of the wall surface. For this reason, in order to choose the right area for installing this product, it is worth exploring important features:
- First of all, it is recommended to check the quality of the walls. For the installation of this system, it is worth choosing a strong and durable wall, which is made of a quality base;
- the most suitable option for installing the hood is a wall surface that is made of concrete or brick;
- it is necessary to prepare fasteners, they must completely fit the selected base;
- When installing the hood, it should be borne in mind that it should be located above the stove at the correct height.
A wall made of concrete or brick is suitable for installation.
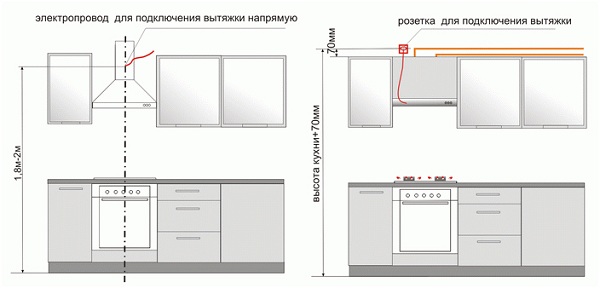
Particular importance is given to the height, the correct functioning of this device depends on it. So, in order to correctly determine the necessary level of height, it is worth following the following recommendations:
- permissible height indicator above the surface of the electric stove is 65 cm;
- the maximum height above the surface of the gas height should be 75 cm;
- it is necessary to strictly observe the lower limits, otherwise the device may fail and melt during heating;
- the upper boundaries of the product must be adjusted to the growth indicators of the hostess;
- you must know the correct width parameters, they must be the same as the gas stove - 50-60 centimeters.
After the surface for installation is selected, and a suitable hood model is purchased, you can proceed with the installation. The design, which will be mounted and connected in accordance with all the rules and recommendations, can last a long time.
Selection and installation of air ducts
Be sure to pick up the duct through which unpleasant odors will be removed from the kitchen. There are no special requirements for this product, for this reason there should not be any special problems with its choice.
Kinds
In total, three types of ducts are distinguished:
- corrugated aluminum sleeve.The main advantage of this element is that it can easily be given the desired shape. It bends easily at any angle. In order to install it, a part of the sleeve of the required length is taken and the desired shape is given to it. However, this type of duct has several drawbacks - the operation of the hood is quite noisy, due to the fact that the flow of exhaust air causes a strong resonance, but the presence of fins on the surface of the sleeve can cause some difficulties when removing air. It is also difficult to care for him, dust, grease, soot are often clogged between the ribs, which are difficult to clean;
- plastic round (PVC). This type of duct is assembled from several sections of plastic elements - roundings, bends, adapters, couplings. The connection to the pipe is due to the presence of extensions on the fittings. In order to prevent separation during installation of the duct, this type of joints can be greased with glue or fixed with screws. The main advantage of these devices is that the air exchange process is silent in them. Also, the smooth surface of the walls does not create obstacles to the passage of air;
- square ducts made of plastic material. These devices are made of polyvinyl chloride (PVC), they have a cross section with a rectangular shape. The remaining qualities of this device are the same as those of others. Typically, rectangular ducts are used in cases where you want to save space in the room.
Installation Features
In order to clean the kitchen area from unpleasant odors, fumes that form during cooking, you need to connect the hood to the ventilation. And to do this, you need to perform the correct installation of the duct.
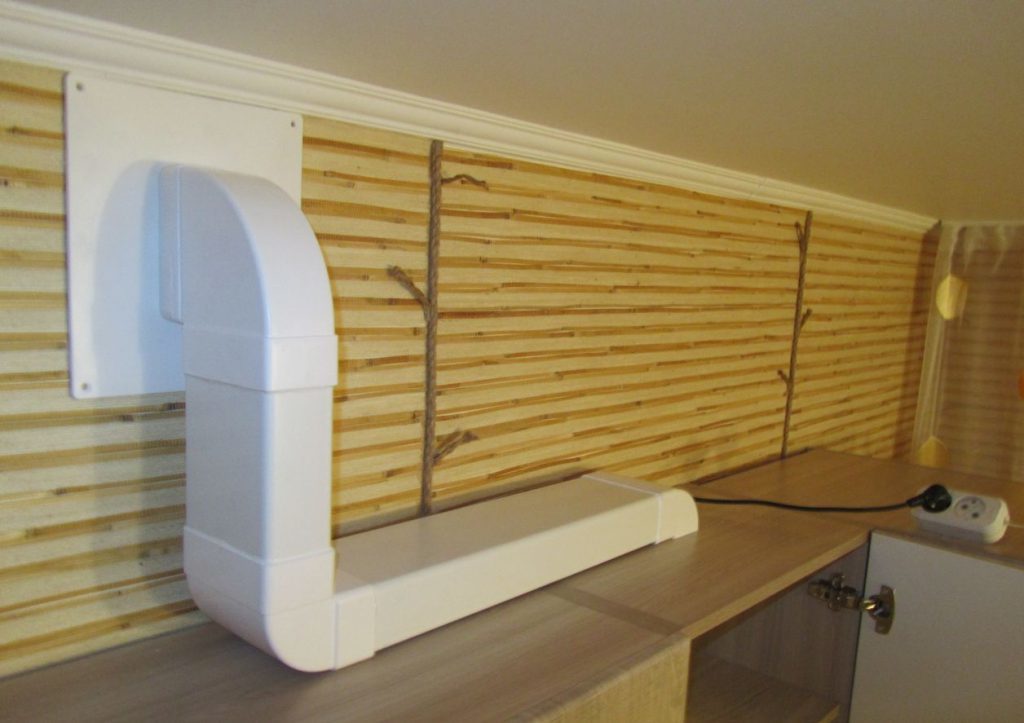
Plastic duct
In order for the installation of this element to be correct and of high quality, it is worth paying attention to several important features:
- air ducts made of plastic material or aluminum, which is made on a semi-rigid basis, are suitable for drawing;
- the most suitable is a device made of plastic, but it is quite expensive;
- installing plastic ducts has some difficulties. In order for it to be of high quality and correct, it is required to purchase additional elements - adapters, a ventilation grill, elbows with horizontal and vertical views, which have a configuration in the form of the letter “G”;
- necessarily need a gearbox, which acts as a connecting device for elements with a round diameter with rectangular products.
Plastic ducts are equipped with many additional elements that help to carry out installation work with any level of complexity. But it will be difficult for a novice master to complete these works, for this reason it is better to entrust these works to professionals.
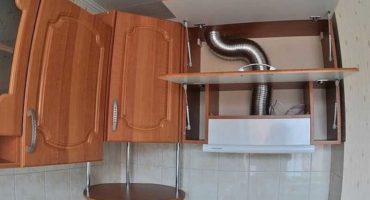
The length of the duct is at least 3 meters
Despite the fact that plastic products have a high cost and installation difficulties, they have high qualities. They are designed for an indefinite period of use, and they do not make noise during the work process.
Attaching the corrugation to the hood and ventilation
If you decide to save money or you don’t have the opportunity to purchase a device to remove air from plastic, then corrugation is a suitable option. But in order to properly connect it to the hood and ventilation, you will need to observe some important nuances.
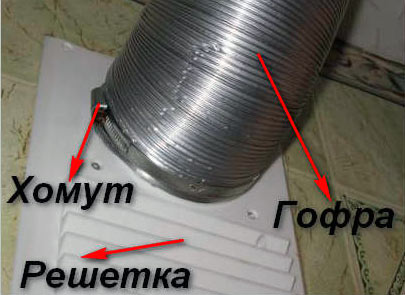
Installing the corrugation on the grill
To maintain the operation of the hood at the highest level, you need to consider the correct fastening of the duct from the corrugation to the body. For mounting, clamps with suitable sizes are required. They can be made of metal or plastic base.
In order to perform connecting the hood to the ventilation systemmay require a special ventilation grill. At the top of this element there is a hole that is designed to connect the duct pipe. In the lower part of the product are openings that are needed to remove air from the kitchen room due to natural circulation during the period when the hood is inoperative.
To install the corrugation, a grid with a ledge is suitable. Around the hole of this element there is a side with a size of 2-3 cm, donning of corrugation is carried out on it. After that, it is fixed using clamps with suitable sizes.
The corrugation is also connected to the hood. It has a special protrusion on which the corrugated duct is installed. After this, it is necessary to perform contraction using clamps with the required dimensions.
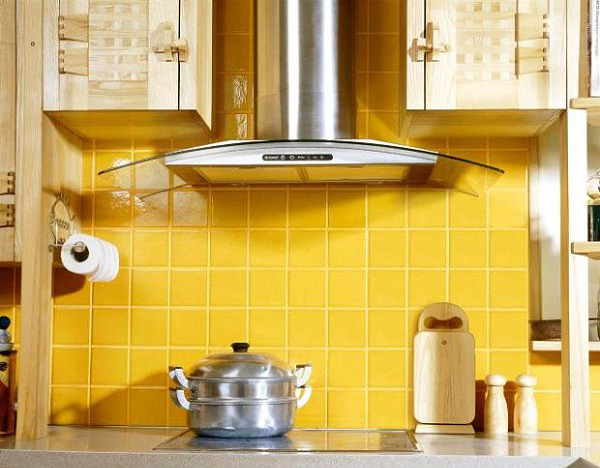
How to install a hood hood
In the modern market of household appliances, hoods with dome shapes are especially popular. They harmoniously fit into the kitchen room and perfectly cope with their functions. These products, in turn, are divided into several subspecies:
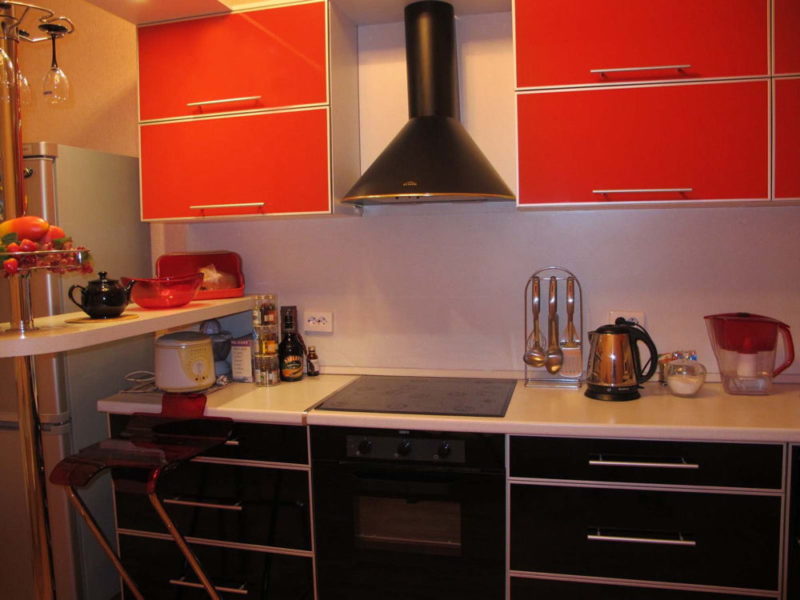
- chimney (wall). These devices are mounted to the wall surface. The arrangement of products of this kind is similar to ventilation systems for fireplaces;
- angular. Hoods with this configuration are rare in kitchens. They are installed only in cases where the stove is in the corner;
- island. These options are mounted only in large rooms, for example, in dining rooms. They are suitable when the gas stove is installed in the center of the room. The fixtures are mounted to the ceiling surface.
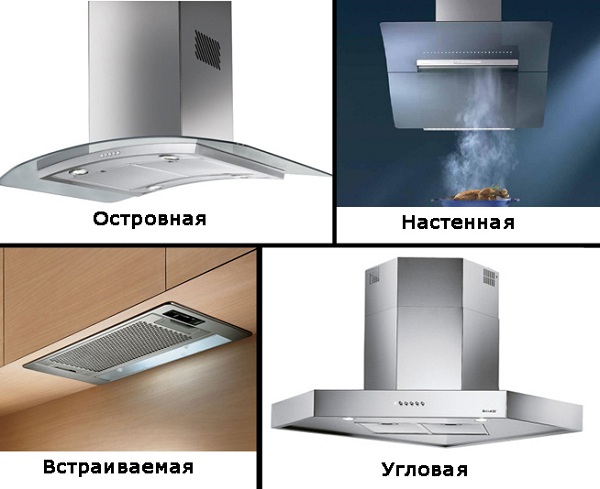
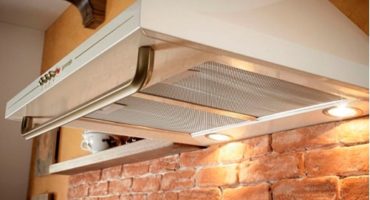
Types of hoods
In order to install correctly dome hood, you need to know the main features of this process. It is advisable to entrust this work to professionals, they will be able to do everything correctly and efficiently.
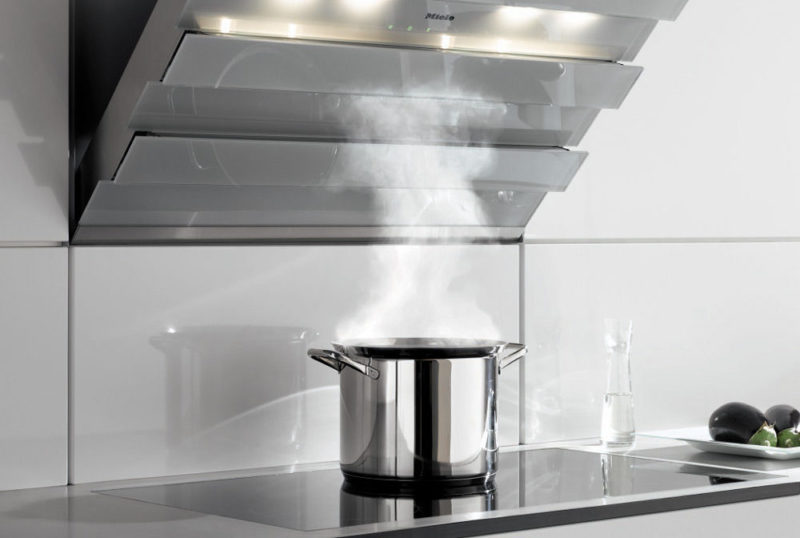
Dome hood installation option
If you decide to conduct an independent installation of the hood, then be sure to remember a few important recommendations:
- in order to install, it is necessary to bring the hood to the ventilation system and connect the device to the electrical network;
- it is advisable to furnish the kitchen room in advance with furniture, and after that make markup of the location of the hood. In this case, it is necessary to take into account the indicators of the height of this device;
- then you need to drill holes for dowels. To them, with the help of bolts, we mount the supports on which the base of the exhaust device is worn;
- after this, the connection of the special exhaust of the exhaust device with the corrugated duct is carried out, while tightness is always observed;
- at the end, the operation of the hood is checked and the upper casing of the device is put on.
Connection requirements
The hood installation must be carried out correctly, taking into account all important requirements. A prerequisite for the installation of this device is compliance with the grounding of an existing electrical outlet. If you do not know how this process is carried out, it is better to resort to professional help.
Proper connection of the cooker hood to the ventilation
Almost every house, apartment has a ventilation system, to which you can connect the hood. In the bathroom and toilet, special vents with grilles are usually installed, which lead to a common shaft.
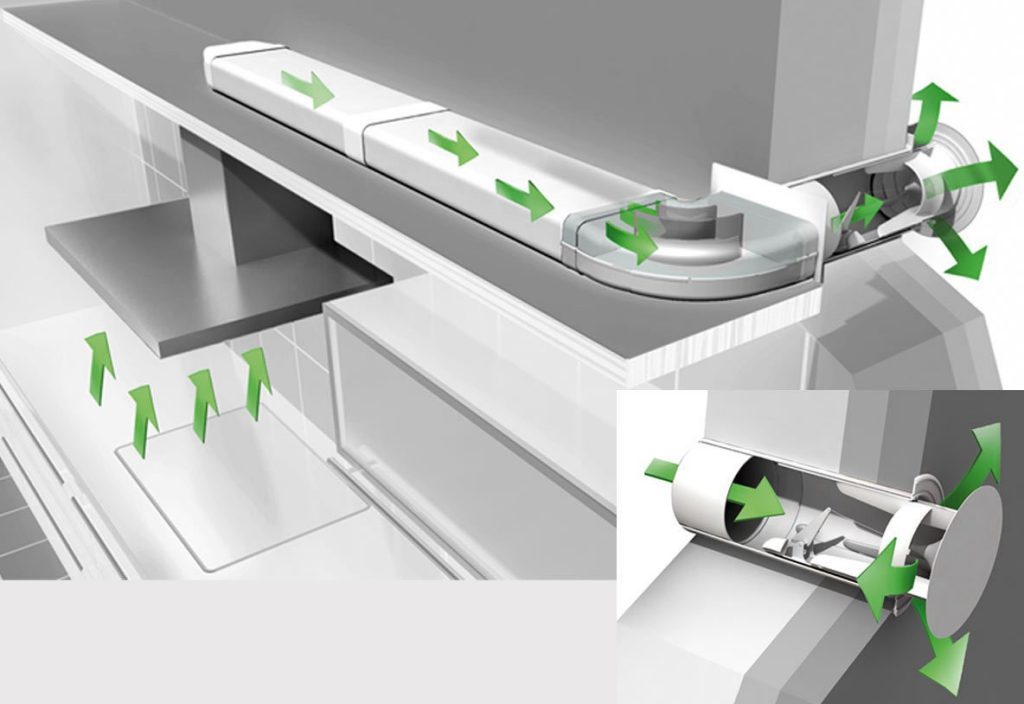
Ventilation device
Features of the installation of the device depend on the choice of connection method. The exhaust device can go into the area of the ventilation hole or immediately outside the room, for example, to the street. If the kitchen room has a separate channel for air exhaust, this will greatly simplify the installation process.
Installing a separate channel can prevent many problems that often arise when using general ventilation.Often the exhausted air, vapors, grease, soot, which enter the general ventilation system, lead to the formation of an air congestion, which can cause a disturbance in the air exchange in all apartments.
Extraction of the hood into a separate air exhaust channel
To prevent all unpleasant situations and problems, it is better to make a separate channel for air exhaust. When organizing it, it is worth considering the following actions:
- in the outer wall you need to drill holes with a diamond drill;
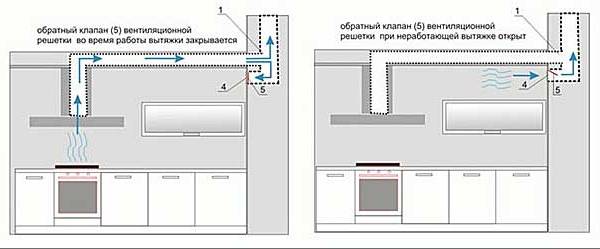
- then a safety grille with a check valve is installed;
- we draw a hood to the non-return valve;
- the check valve can be made of two moving leaves, which are installed in the duct duct;
- after the exhaust device is turned on, the flaps open, and after it is turned off, they close. This will protect the room from getting cold air into it.
Installing the exhaust hood and connecting it to the ventilation is a complex process. During it, it is required to comply with all established requirements and rules, on which the further correct functioning of this device depends. To properly connect it to ventilation, air ducts are required, which can be made of plastic or corrugated aluminum material. It is better to study the characteristics and features of these products.