If the bearing is buzzing in your washing machine or it has broken at all, then for the full operation of the device it is necessary to replace it. Otherwise, the drum soon begins to dangle, which affects the operation of the remaining parts of the washer. If the replacement of the drum bearing is not timely, then this may cause malfunctions in the entire system.
If you need to replace this part, then in this situation there are two options for how to repair.
- Call a specialist who will quickly and efficiently change bearings for washing machines. But then you have to lay out a tidy sum, because replacing the stuffing box and bearing, which will be done by a professional on a washing machine, is not a cheap pleasure.
- The second option is to replace the drum bearing with your own hands. You may spend a little more time than you would like, but you can save some money.
If you chose the second option, stock up on a set of specific tools. This material will describe in detail how to remove the bearing from the drum of your washing machine and how to lubricate the bearings installed in the washing machine.
Preparing for repairs
When starting to repair bearings, the first thing to do is take care of preparing all the tools that may come in handy. Also buy replacement parts that need replacing. You may need the following items:
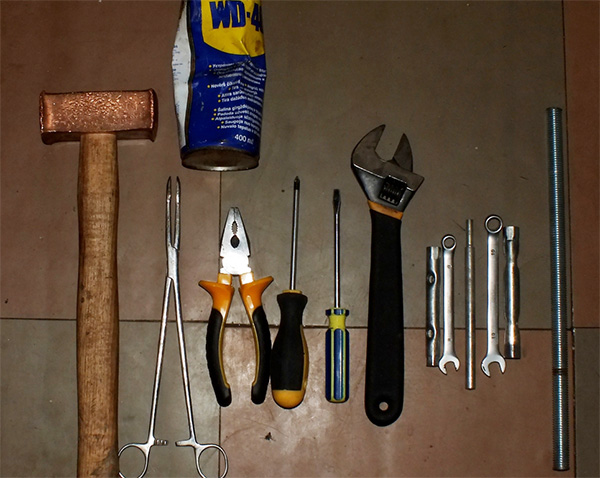
Tools required for work
- Hammer
- Wrenches of various sizes
- Pliers
- Metal rod
- Phillips and flat head screwdrivers
- Sealant - Silicone
- Waterproof grease
- Camera - each stage of repair should be photographed. Thus, it will be easier to assemble a washing machine.
Bearing replacement in the washing machine should be performed after the purchase of new parts. It is necessary to purchase a couple of bearings and an oil seal. Of course you can disassemble the washer first and by the number of unsuitable parts, buy new ones or simply indicate to the seller in a specialized store the brand and model of your washing machine.
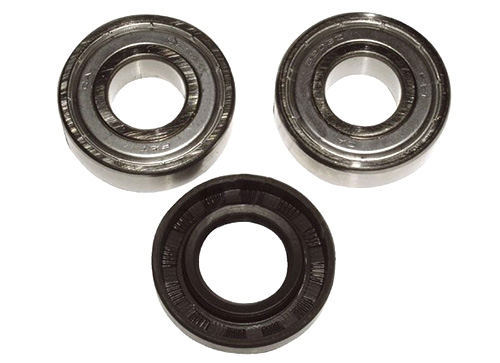
Bearings and oil seal
How to disassemble a washing machine
When the tools and parts are ready, you can proceed with the repair.
First remove the top panel of the washer. To do this, unscrew the two self-tapping screws located on the back wall, carefully slide the cover back and lift it.
Then the lower panel and the upper dashboard are removed. First remove the tray where the powder falls asleep (just press the button from the plastic and at the same time pull the tray slightly towards you). In order to remove the instrument panel, unscrew the screws. In each model, they can be in a variety of places. The number of screws used may also vary.
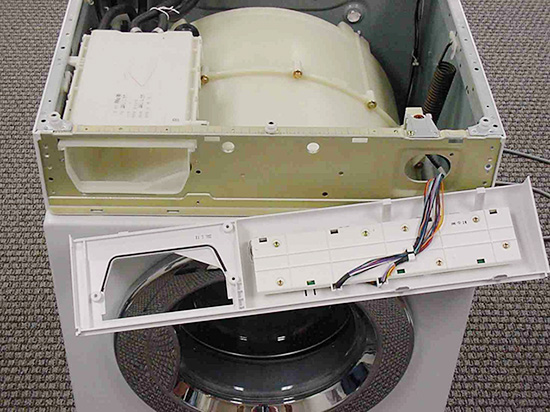
The dashboard on the top of the washer is removed
It is on this panel that the board is located, as well as most of the wires, because of which this part of the washer is not completely removed. First, unplug all the wires from the sockets to which they are connected and then remove the dashboard.
On a note! Using a marker, mark which wire is connected to which jack. This will help to correctly connect the wires during the assembly phase.
Then you can start to remove the bottom panel of the washing device. Use a flat head screwdriver.She needs to press the latches that hold the panel and then pull it out.
The next step is the removal of the sealing gum, which is called the cuff. It does not allow you to completely remove the front of the washer. The elastic is attached to the hatch with two clamps. Find them and gently pry the elastic with a flat screwdriver and remove it at the same time as the clamps.
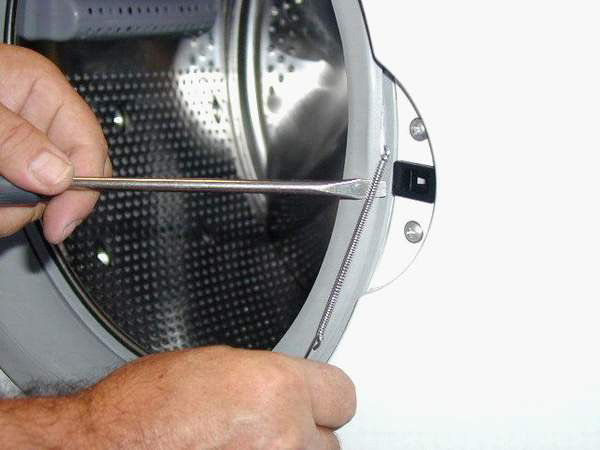
Gum Removal Process
Then remove only the edge of the gum that is in the front and stick it in the middle of the tank.
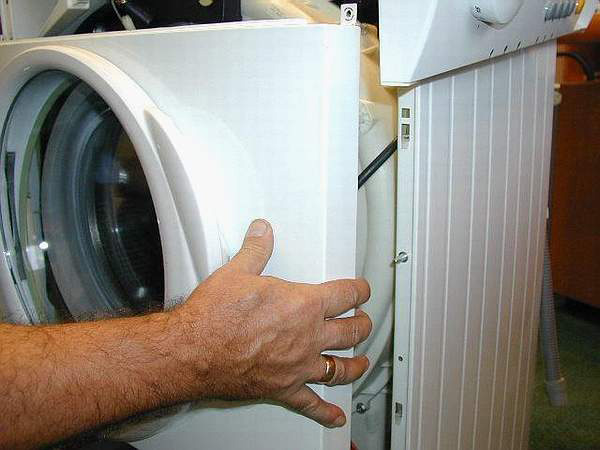
Removing the front of the washer
Tightly cover the hatch and feel the panel at the bottom as well as at the top. It is there that the screws that hold the front of the washer are located. Unscrew them and remove the panel from the hook holding it. This should be done as carefully as possible due to the fact that the panel itself is connected using several wires to the washing device.
Next, remove the top of the machine with the powder tray located under the control panel. At the back of the washer there are bolts holding the filler valve. Unscrew them, because this valve is removed at the same time as the upper part. Then unscrew the screws, remove all pipes. Do not forget about wires that do not allow you to remove the top. Disconnect the drain pipe by unscrewing the clamp. The next step is to disconnect the wires leading to the heater.
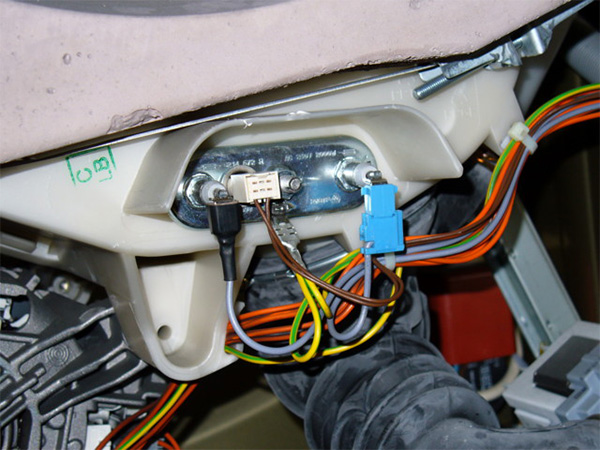
Disconnecting wiring
Still need to disconnect all possible wires from the motor. Then you need to unscrew and get the balances to make it easier to remove the tank. First, disconnect the pipe that connects the pressure switch and start unscrewing the shock absorbers installed in the washing device.
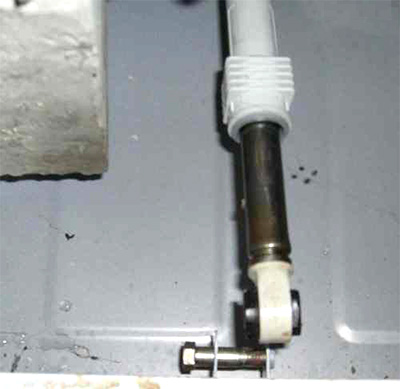
Shock Absorber Disconnect
When all of the above actions are completed, the tank is left hanging exclusively on the springs. To remove it is very careful with the motor. Before removing it, you need to unscrew it, then shock absorbers and a special belt are removed from it.
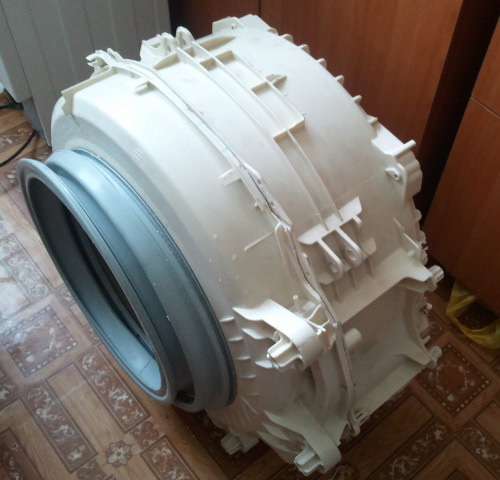
Washing machine drum
When you remove the tank, you can begin to disassemble it and change the bearings.
Dismantling the drum
How can bearings be lubricated and changed in a washing machine? To do this, divide the tank into two parts and remove the drum placed in it. The tank parts will be fastened with special latches or with bolts located around the perimeter.
Dismantling the washing tank
In order to be able to remove the rear half of the tank, first remove the pulley. Using a prepared wrench, carefully unscrew the special bolt that allows the pulley to stay on the drum axis. When the pulley is removed, the bolt must be screwed back so as not to damage the shaft when the drum is knocked out.
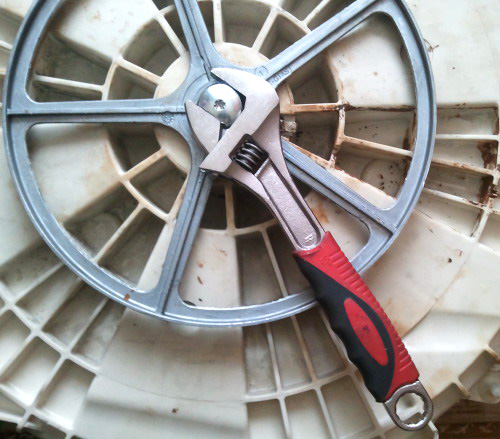
Pulley Removal Process
Then use a hammer. Lightly tap them directly on the shaft. Continue to do this until the shaft is completely drowned in the cap of the screw. Then unscrew this bolt and remove the drum from the back of the washing tub.
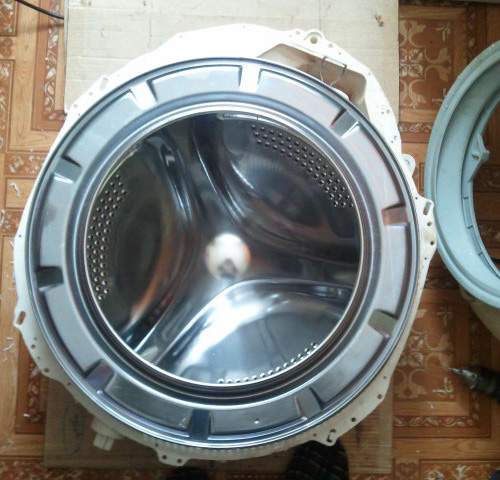
Carefully inspect the sleeve, as well as the shaft, which is located directly on the drum itself. If you are doing untimely repairs, then the cross may have broken or been damaged. Walk on the shaft with a clean, damp cloth and inspect for damage, check for any workout on it. In order to exclude its presence, put the purchased bearings on the shaft. This will determine whether or not there was at least a small play in the new part. If there is still play, then in this case it is impossible to do without replacing the spider and shaft.
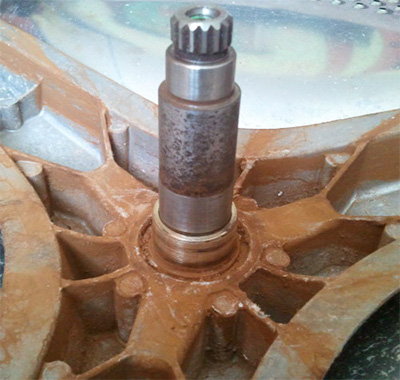
The shaft in the drum of the washing machine
In addition, check the sleeve located on the shaft. She will need to wear an oil seal. The sleeve should not have too pronounced development or grooves. In the presence of a working hole on the sleeve, a new oil seal will allow a small amount of water to pass through. This will cause a quick breakdown of new bearings.
Replacing bearings in a top-loading and front-loading machine
Now you can move on to replacing the bearings. First, remove the stuffing box from the back half of the washer, use a metal rod. Point it on the bearing, hit with a hammer and at the same time move the rod in different directions. Thanks to such manipulations, damaged bearings can be quickly knocked out.
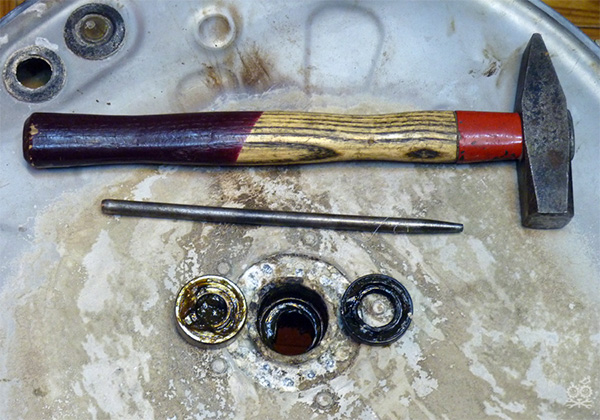
We get the stuffing box and bearings from the drum
To knock out a small bearing, it is necessary to beat from the inside of the tank, and a large one is knocked out exclusively from the outside.
When the bearings are knocked out, thoroughly clean the back of the tank and the places where new parts will be installed from dirt.
Next, get the bearings purchased. It’s worth starting from the part that is smaller. The procedure is done just like knocking out. When the bearing reaches the place where it should be, the sound from hitting the rod will become several times more sonorous.

Installing a new bearing
The same needs to be done with the second larger bearing. After that, grease the new stuffing box with the grease prepared in advance and install in the place where it should be. If it is worn poorly, you can knock a little with a hammer, but very carefully so that there is no damage.
Assembly of the washing machine after repair
When you change bearings, an oil seal, you must carefully lubricate the entire sleeve located on the shaft of the washer tank with waterproof grease. Set the shaft in place. Then connect the tank parts together. If necessary, then at the same time you can change to a new sealing gum. If you did not buy it, then you can use a sealant. Fill them completely with the groove where the elastic is and then connect the parts of the tank.
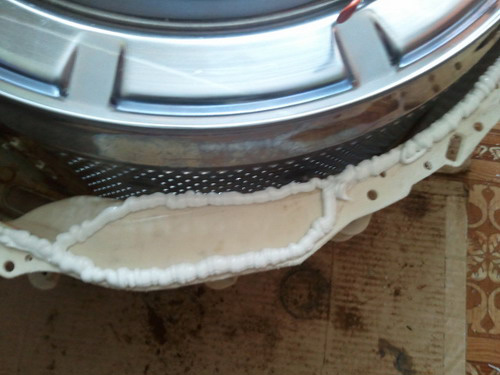
Filling the groove with sealing rubber with silicone sealant
The final step will be the assembly of the washing device. Perform the actions in the reverse order. It was for this that it was necessary to do photographs throughout the disassembly, which would help to put everything together correctly.
It is not very difficult to remove the bearing, lubricate or replace it, and such a procedure can be done by yourself. Carefully follow our instructions and you will succeed!