- Remove the battery
- Dismantling the housing segments
- Keyboard disconnect
- Disabling internal device connectors
- Separation of the main body parts
- Dismantling the cooler and radiator
- Fan cleaning and lubrication
- Blowing the radiator and removing residual traces of thermal paste
- Drawing thermal paste and installation of a radiator in place
- Mounting
- How often do I need to change thermal grease in a laptop
- Video - how to do prevention
Long and intensive use of the laptop inevitably leads to the need for maintenance. It manifests itself in frequent freezes, overheating and similar symptoms. It is overheating that is the problem for the vast majority of laptops.
Too small sizes to install a complete cooling system force the use of mobile types of designs. After some time, the cooling ceases to function normally and fulfill its responsibilities. To fix this problem, you need to disassemble the laptop and carry out maintenance of the cooling system, which directly includes the replacement of thermal paste on chips.
Thermal grease is a substance that provides the maximum area of contact between the surface of the chip and the cooling element. This is necessary for the most effective removal of high temperatures from the main components of the laptop. How to change thermal grease on your laptop? The answer to this question is contained in the article.
Remove the battery
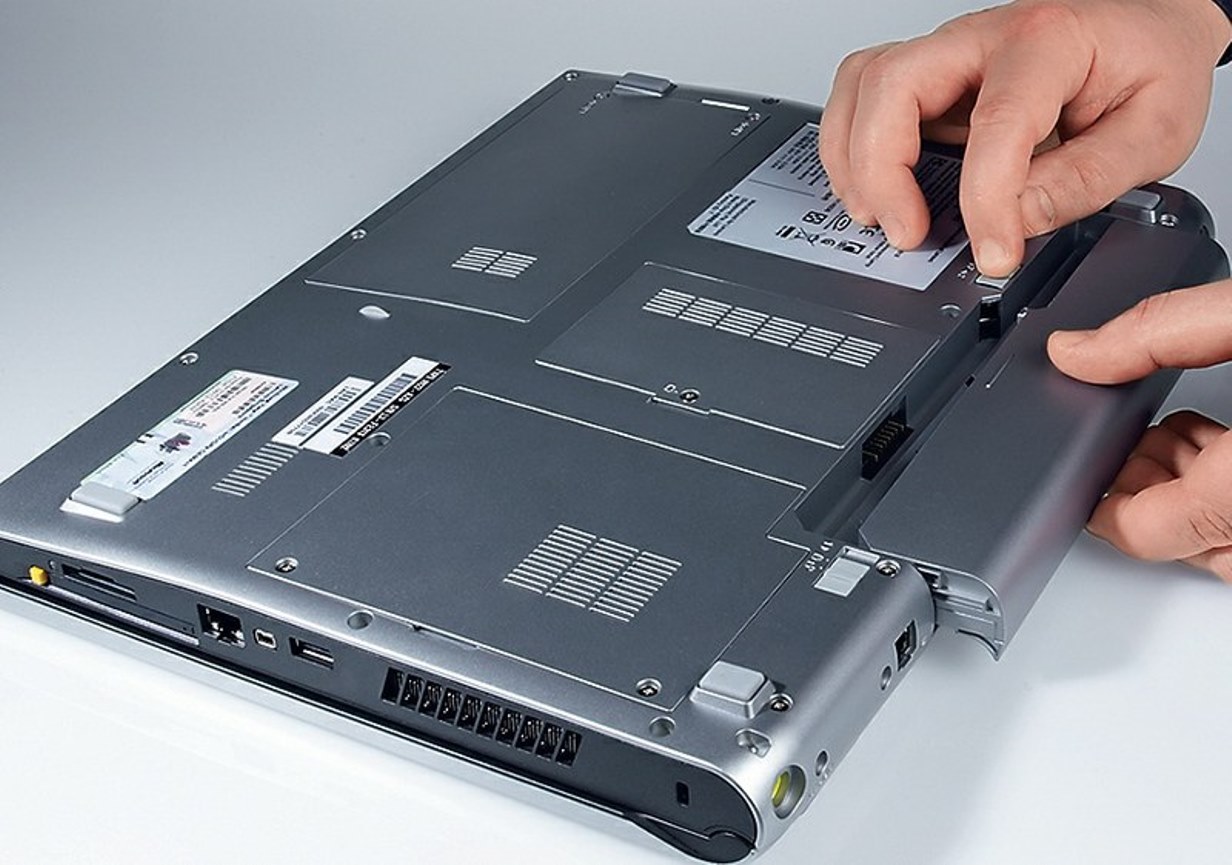
Battery
The first step in disassembling a laptop is a complete blackout. This applies not only to disconnecting the power supply, but also removing the battery from the device itself. Most manufacturers provide for removing batteries without much difficulty without disassembling the device. However, on some models, the opposite picture can be observed: the battery is located inside the case and is not subject to initial removal.
Removing the battery in the first step will avoid numerous problems in the future. Any components of a laptop that are under voltage are extremely sensitive to various mechanical influences. This is not to mention the fact that random movement can simply shorten unnecessary contacts. And this, in turn, can lead to failure of the components of the laptop. So, if the battery is removed, it must be removed. Otherwise, accuracy during disassembly should be maximum.
Dismantling the housing segments
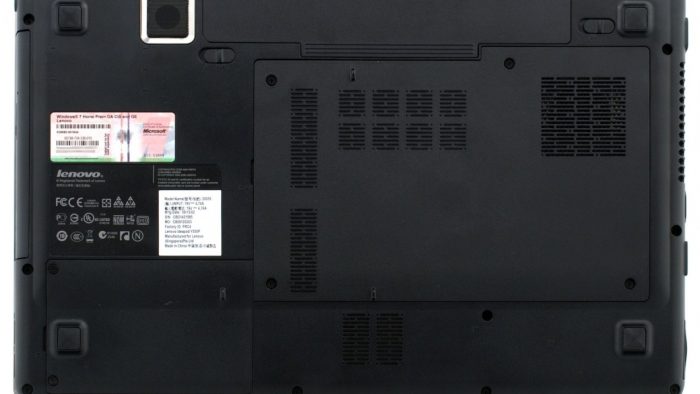
Body segments
Next, disconnect all housing segments that are attached separately. These include all the rear covers, allowing access to some components. Typically, manufacturers thus simplify access to RAM, hard drive and Wi-Fi adapter. If, after removing the covers, access to these components opens, they must also be pulled out. Wi-Fi adapter must be disconnected from the motherboard, and then unscrew the retaining screws.
RAM is mounted on special latches. They need to be bent and gently pull out the trims. By the way, pulling out the RAM is not a mandatory procedure and is recommended only for those laptops in which memory slats can interfere with further disassembly.
The hard drive is mounted in a special recess. Usually, simply pulling the disc and pulling it out of the appropriate slot is enough. But sometimes manufacturers provide for additional mounting of the disk to the case with screws.
Sometimes at this stage the opportunity to pull out the drive. It is pulled out from the side, along with a special external panel. Most laptops do not have special mounts for the drive.
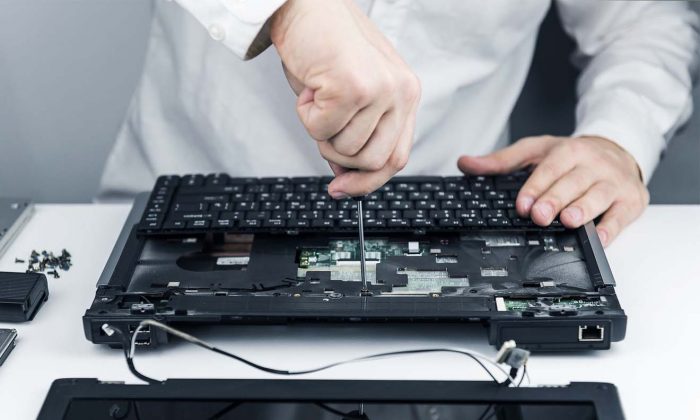
Keyboard disconnect
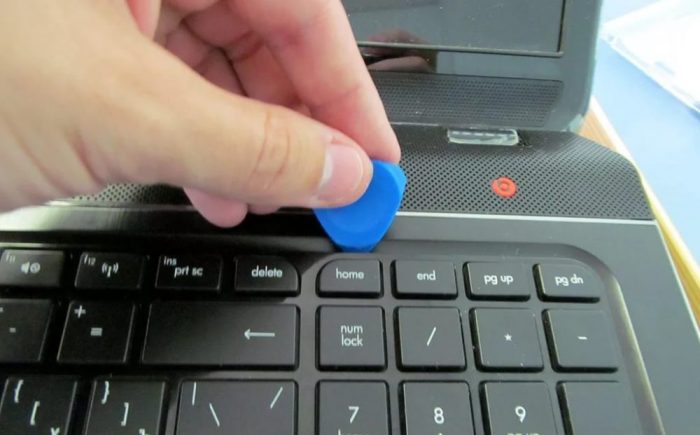
Keyboard
Continuing disassembly requires turning the laptop over and inspecting the keyboard. It can be detachable or fixed in the housing. More common are detachable keyboards. They can be identified by visible gaps between the case and buttons. To disconnect the keyboard, it is recommended to use some paddle or pick. You need to go around the keyboard around the perimeter and snap off each mount. Do not rush and put too much effort. The latches are quite fragile and can simply break. If after the first time the keyboard is not removed, you need to repeat the procedure until any obstacle is removed.
Sometimes manufacturers equip the keyboard with a special external frame. In this case, you must first remove it, and only then do the keys. The keyboard is connected to the motherboard using a cable, which must be carefully separated.
As soon as the keyboard is removed, access to the top cover will open. It must be unscrewed to get to the motherboard. A look opens the back of the motherboard.
Disabling internal device connectors
All laptop components are connected to the motherboard. At this stage, you need to disconnect all possible connectors so that nothing prevents the opening of the case. All indicators, additional buttons, and other devices are wired. Each of them is removed from the corresponding groove. It is recommended to sketch the location of certain connectors. This will help to avoid assembly errors and possible problems in further work.
Separation of the main body parts
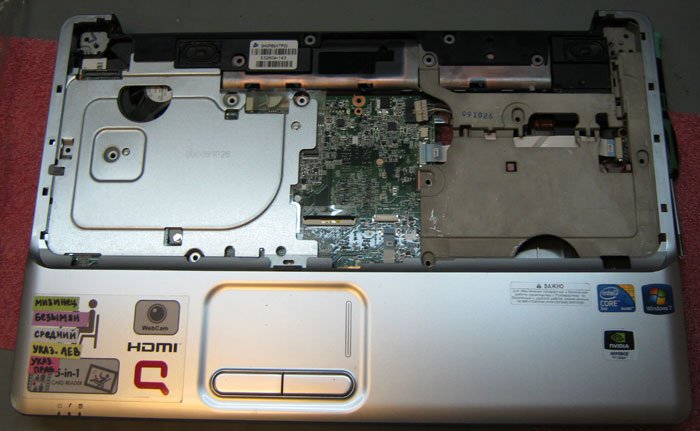
Cover removal
After all possible components have been separated from the motherboard, you can do the separation of the laptop parts. The upper part is attached to the bottom using latches. The same tool is used as when removing the keyboard: scapula or pick. You need to walk around the perimeter and snap off all the fasteners. Everything is done as accurately as possible and without rush. Broken latches will cause the case to cease to be airtight and will quickly pick up dust. Not to mention the aesthetic properties of a not completely closed laptop with slots.
Once all the mounts are clicked off, the top of the laptop can be removed. Now it is possible to remove the motherboard and conduct proper maintenance of the cooling system.
Dismantling the cooler and radiator

Dismantling the cooler
The removed motherboard unfolds on the side on which the cooling system is located. You need to carefully inspect the system. It is a cooler to which radiator tubes are connected leading directly to the processor.
The dismantling of the radiator should be treated as carefully as possible. There should be screws in the area where it is attached to the processor. And to unscrew them anyhow as it is not recommended. Each screw must be numbered, and the number indicates the order of tightening. It is logical that disconnection should be carried out in the reverse order from a larger number to a smaller one. This is intended to eliminate the uneven load on the processor. Otherwise, there is a risk of bending the legs of the main chip, thereby disrupting its performance.
Having disconnected a radiator it is possible to start removal of a cooler. It is screwed. The entire cooling system is pulled out of the housing and is preparing for further maintenance.
Fan cleaning and lubrication
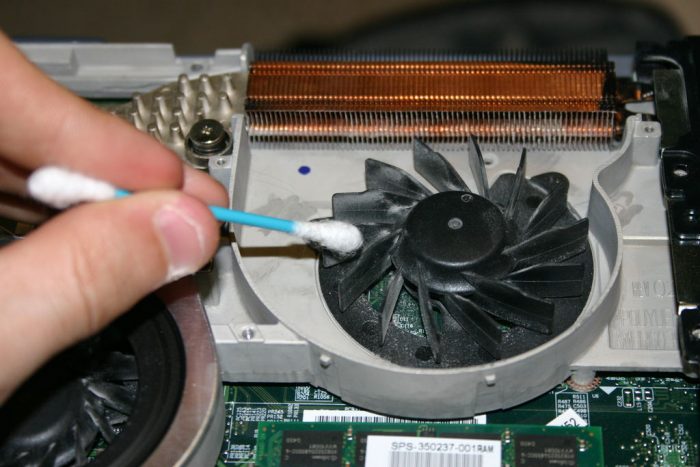
Fan cleaning
Now you can do directly the maintenance of the cooling system. The first thing to do is inspect the fan. In heavily operated devices, it can be very dusty, and there is insufficient lubrication in it. All this leads to difficulty in rotation, noise or complete inoperability. Maintenance begins by cleaning the fan from dust. It is best done with a thin brush.Blowing will not be superfluous.
As soon as the fan is dust free, it is recommended that you always lubricate the component. This is done through a special hole or after disassembling the fan. This ends the fan service and, in most cases, its performance is restored. If the problems are much more serious than expected, the fan must be changed.
Blowing the radiator and removing residual traces of thermal paste
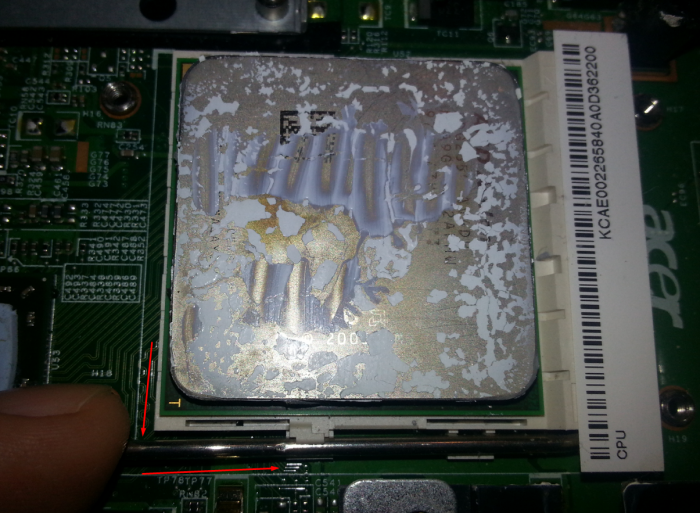
Thermal paste removal
Next is the radiator service. It needs to be properly blown to remove all the dust accumulated inside. A mechanical brushing may also be required. But the most important issue for the radiator is the removal of the old thermal paste from the surface in contact with the chip. The procedure can be performed with alcohol. It is necessary to carefully remove all residues with a napkin or cotton pad. But you need to make sure that no villi remain on the surface. The radiator is cleaned to achieve a specular gloss near the surface. Any serious mechanical stress must be avoided. Any scratch may adversely affect the heat transfer efficiency.
Old thermal grease should be removed not only from the radiator, but also from the chip itself. In this case, you need to act even more carefully, since the processor is very sensitive to any influences. The chip at the end of cleaning should not have any trace of thermal paste.
Drawing thermal paste and installation of a radiator in place
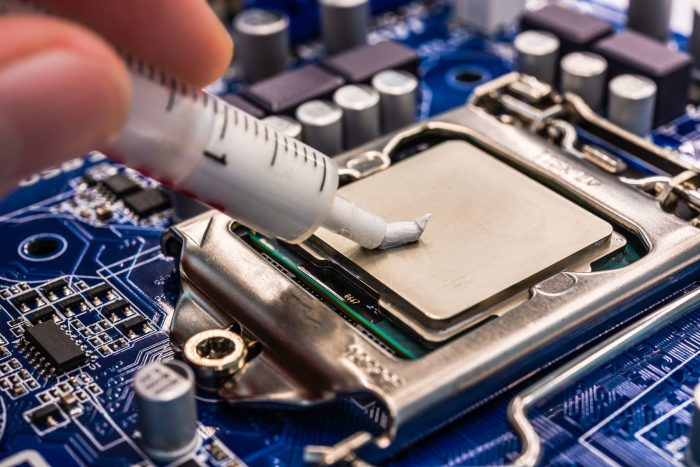
Thermal Paste Application
Now you can start applying thermal paste. Through a special dispenser, a small drop of the substance is applied to the processor. The next question is: how much to apply? Too many can adversely affect the cooling system and the overall performance of the device.
Thermal grease should be distributed evenly over the entire surface of the chip. This can be done with a bank card or something similar. It is recommended that thermal paste not get on other components of the laptop. As soon as the paste is applied over the entire surface, it will penetrate all the microcracks and begin to function.
The next step is to install a radiator. Mounted over the processor. And again, you need to carefully look at the numbers near the mounts. The screws must tighten in a certain order from a smaller number to a larger one. Only in this case can the uneven load on the processor be avoided. Together with the radiator, a cooler is also installed in place.
Mounting
Service completed. Now you need to mount all the components of the laptop in place. Build in the reverse order. Well, if during disassembly, the locations of the individual components and screws were fixed. Otherwise, you can simply forget to return something to its place.
The motherboard is installed in place, all connectors and additional devices are attached to it. The top cover of the laptop is installed in place and snaps around the perimeter. The keyboard is attached, as well as the external panel (if present). All components that have been pulled separately are inserted into place and covered with lids. Now the battery is installed and the laptop is ready to go.
How often do I need to change thermal grease in a laptop
Service
Typically, replacing thermal grease is a necessary procedure, which is a response to obvious violations in the operation of the device. Excessive overheating, noise, and excessive dust are considered the main symptoms. Each of these symptoms can lead to much more serious problems. Therefore, it is recommended simply not to bring the laptop to this state. This is done with the help of timely scheduled maintenance with the replacement of thermal grease and cleaning the cooling system.
How often and where do I need to change thermal grease? Manufacturers recommend servicing at least once a year. You can service the device yourself or take it to a service center.If you have doubts about your own knowledge, experience and attentiveness, then it is better not to take risks. Qualified service center specialists will quickly carry out laptop maintenance for a very small amount.
Well, do not forget about the prevention of pollution of the cooling system. You should not use the laptop on blankets and other soft surfaces. Not only can air be blocked, but also different fibers from the fabric will fall into the laptop.
Video - how to do prevention
How to replace thermal grease on a laptop, look at the video: