A laptop is a sophisticated technique that requires proper use and care. Even with all the rules, the machine may suddenly fail. Therefore, users should know how to independently check the laptop for operability in the event of a malfunction.
The need for verification
It is necessary to carry out a health check of a laptop at home at least once a month. You can independently:
- test the operation of RAM;
- determine the functionality of the hard drive;
- diagnose devices;
- detect software or system errors.
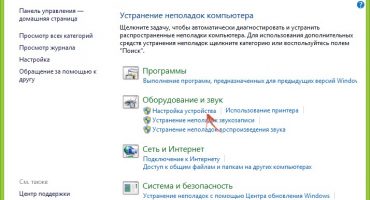
Checking laptop performance
System Tools Check
You can test the performance of the system, its components, installed devices using both built-in programs and installed independently.
Windows Vista 7 and 8
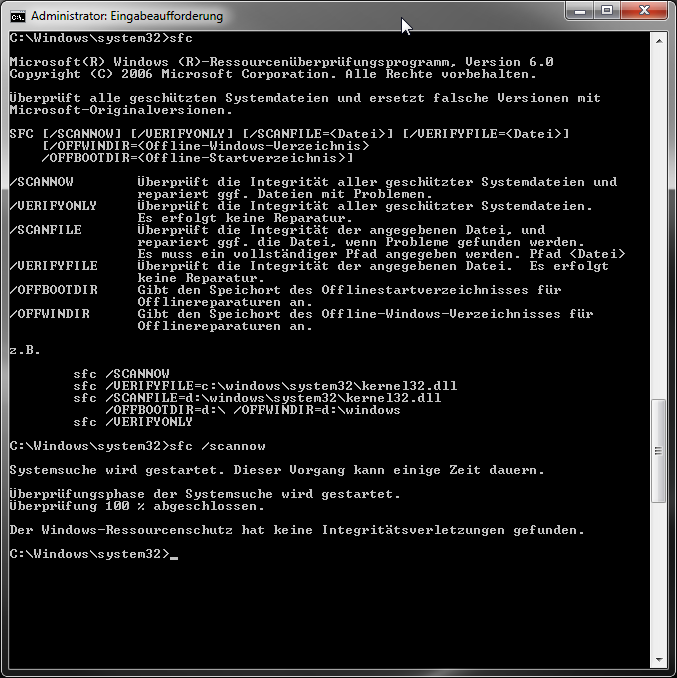
In Windows vista 7 and 8, a utility is preinstalled with which you can determine system malfunctions. To do this, you need:
- in the Start menu, enter the command in the search line: sfc / scannow;
- press Enter;
- RMB call Properties and select "Run as administrator";
- in the window that opens, the diagnostic progress will be displayed;
- Do not close the window until the utility is finished;
- When the test is completed, a system message will appear indicating the results.
Verification with the built-in utility
Windows 8 and 10
Before starting the troubleshooting utility, users of Windows 8 and 10 need to run the DISM system:
- enter in the command line: DISM.exe / Online / Cleanup-image / Restorehealth;
- press Enter;
- wait for the command to complete.
Next, run the utility for troubleshooting:
- at the command prompt enter: sfc / scannow;
- press Enter;
- RMB call Properties and select "Run as administrator";
- if the system asks for a password, enter it and click "Allow";
- in the window that appears, the scan progress will be displayed;
- Do not close the window until the utility is finished;
- upon completion of the test, the system will display results messages;
- if the results do not appear, you can find out in the journal CBS.Log.
Universal way
There is a method that allows you to diagnose, regardless of the version of Windows. To check you need:
- Log in to My Computer
- select a disk for verification and enter its properties;
- in the window that appears, open the “Service” tab and click “Perform Scan”;
- check the boxes in empty cells and click "Run";
- in the window that appears, click on the "scan schedule" and select "At the next start";
- reboot the machine;
- verification will start automatically at startup;
- upon completion of the diagnosis, the system will produce results.
Verification in a universal way
Possible causes of a laptop malfunction
A laptop malfunction can be software, hardware, or mixed. In the first case, there are problems with the system, system files, programs, in the second - with the hardware itself, in the third - with both. Possible malfunctions:
- Pop-up windows with system errors and viruses appear systematically;
- incorrectly installed drivers;
- damaged files;
- hard disk is damaged;
- RAM out of order;
- corrupted BGA chips;
- the screen is broken;
- power supplies do not work.
Diagnostics of random access memory and identification of errors
RAM diagnostics can be done using the preinstalled utility or Free memtest86 +.
Method 1
Procedure:
- There are two ways to find the launch of a utility: through the Start menu or by entering a name in the search bar.
- We go to the "Start" menu, select "System and security", select "Administration", click on the "Memory Diagnostics" item.
- Drive the phrase “Windows Memory Checker” into the search engine, select the result found.
- In the window that appears, select the preferred option to start the scan, click OK.
- After starting the system, the RAM module will be automatically tested.
- During the test, you can change the diagnostic parameters by pressing F1.
- Three parameters can be changed: the type of check, whether or not to use the cache, the number of test passes.
- At the end of the test, the laptop should automatically reboot, and after bootup, display the diagnostic result.
- If the test result does not appear, it can be viewed in the "Windows Logs" in the "System" section.
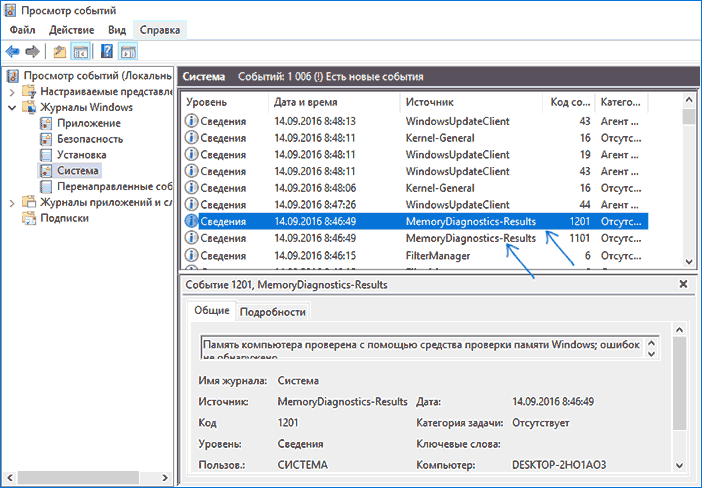
View error in log
Method 2
You can check the RAM by downloading the free memtest86 + program from the official site. After downloading, you need to create a flash or CD image. You can then run the utility by unzipping the data from the image or by directly launching it through the BIOS. During the test, the screen will display:
- process information;
- the maximum possible speed of the RAM module and its volume;
- RAM feedback information;
- chipset data.
If there are no errors at the end of the process, the Pass column will be 1 and a notification will appear on the completion of the test and no errors. If errors are found, a red table with problem places and addresses will appear on the screen.
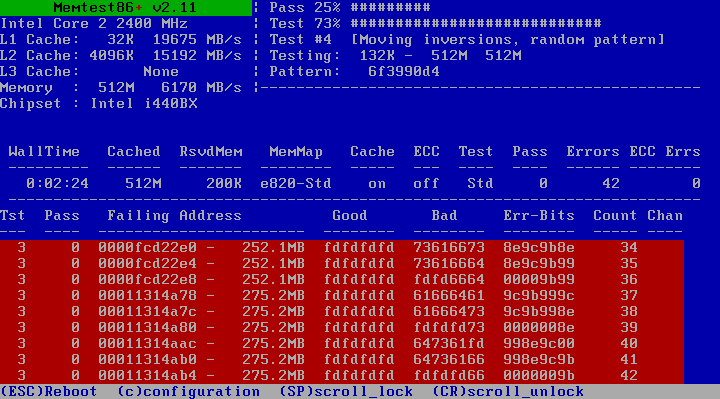
Using memtest86 +
If a malfunction is detected, you can try to return the modules to working condition yourself. To do this, turn off the laptop, remove the memory strips and carefully clean the contacts with an eraser. Then blow through the stripping places thoroughly and put the modules back in place.
After turning on the machine, you can run the test again. If after repeated diagnostics the errors disappear, the cause of the malfunction was in clogged contacts. If errors persist, the modules, connectors, or components of the motherboard may be malfunctioning. In this case, it is necessary to take the laptop to a service or dealer center for an accurate diagnosis.
Hard drive diagnostics and error detection
All HDD malfunctions are divided into two groups: physical and logical. The first include damage to the body of the disk, the second - damage to the file system. You can check the health of the hard drive with built-in utilities or installed programs.
Scan through the "Explorer":
- to run the diagnostics you need to go to "My computer";
- by clicking RMB to call “Properties”, go to the “Service” tab;
- click on the button “Run test”;
- check the box in the window that appears and click the "Run" button;
- after the diagnosis is completed, a notification about a successful verification will pop up, as well as errors found in the process.
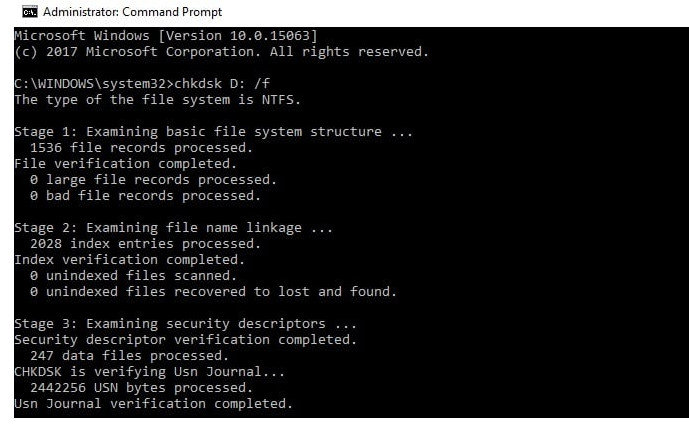
Diagnostics by chkdsk utility:
- In the search bar of the Start menu, enter the command chkdsk with: / f.
- After chkdsk, the verification section is indicated.
- Next, through / the necessary parameters are indicated:
- 1.2.1. - perform a check and automatically correct errors;
- 1.2.1. - display the full names and paths of files;
- 1.2.2. - find bad sectors and automatically repair them;
- 1.2.3. X - disable volume before verification;
- 1.2.4. - do not check strictly index elements;
- 1.2.5. C - do not check loops inside folders.
- Run the command as administrator in the window that appears.
- After the diagnosis is completed, a notification of the work done will appear.
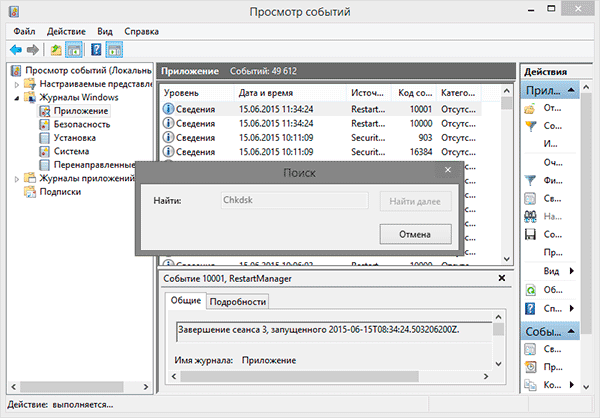
- If the dialog box does not appear, the test result can be viewed in the logs: Windows Logs / Application / Search, enter Chkdsk.
Diagnostics by chkdsk utility
Verification using third-party programs:
- Victoria is the best program for diagnosing a hard drive and fixing errors on it.
- HDD Regenerator is an effective program that evaluates the status of the HDD and fixes problems on it.
- TestDisk is a drive testing program that detects bad sectors and corrects errors.
- Hitachi Drive Fitness Test - a universal program that is designed to diagnose all drives, able to find and fix problems.
- Seagate Seatools for Windows is a utility that can fix problems and crashes, find incompatible hardware and driver errors.
Laptop device diagnostics
How to diagnose laptop devices? Very simple. It is enough to use the Device Manager. In the "device manager" can be reached in two ways:
- In the search bar of the Start menu, type mmc devmgmt.msc and press Enter.
- Follow the following path: Start / Control Panel / Device Manager.
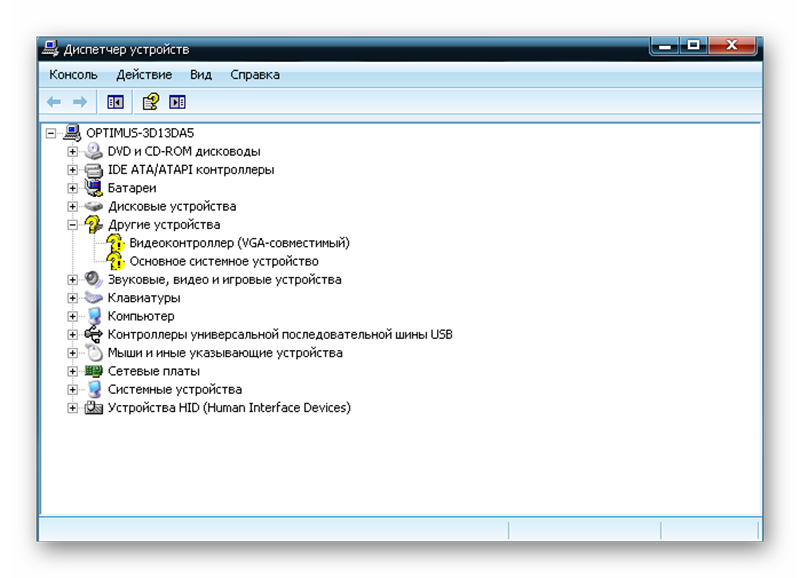
device Manager
In the window that appears, you need to look at all the tabs for the presence of yellow and red icons. If such icons are found, you can correct the errors yourself or contact a service center for help.
You can use the Ubuntu distribution to test the health of devices. To work, you must create an image of the program on disk, and then download it without installing it on the machine. After the download is complete, you need to select the language and start Ubuntu.
To start device diagnostics, you need to go the following way: Applications / Accessories / Terminal.
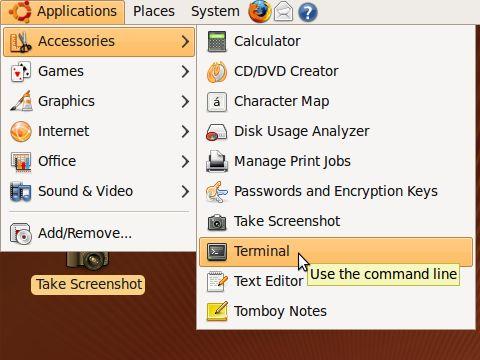
Ubuntu Application
To display devices connected to USB in the window that appears, you need to enter the Isusb command, and Ispci to the PCI bus. If all devices are displayed, it is most likely that they all work properly.
Data Access Diagnostics
For diagnostics, you need to use the Ubuntu utility. Before starting the test, you must write the distribution image to disk. Then download the program from the disk without installing it on the laptop. Next, in the window that opens, you need to enter Places and select Computer.
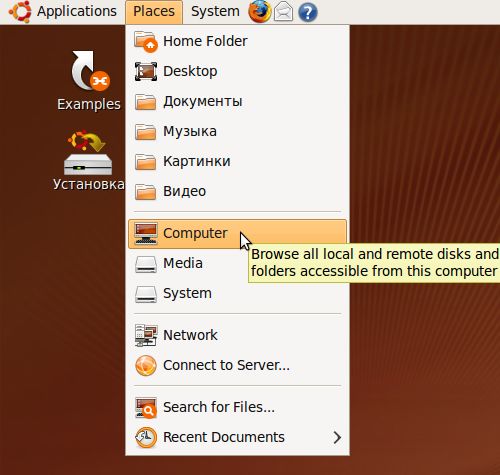
Diagnostics with Ubuntu
A window appears with all the partitions located on the hard drive. The principle of working with folders is no different from working in Explorer. Here you can copy or transfer the necessary information both to another section or folder, or to a flash drive.