A screenshot is a snapshot of the image displayed on the screen display, its area, which is saved on the hard disk, is inserted into the document. There are a lot of methods to get a screen on a laptop, and the Windows functionality is enough for creating and primary processing of images. Consider the options to get such a picture, let's start from the simplest.
Print screen
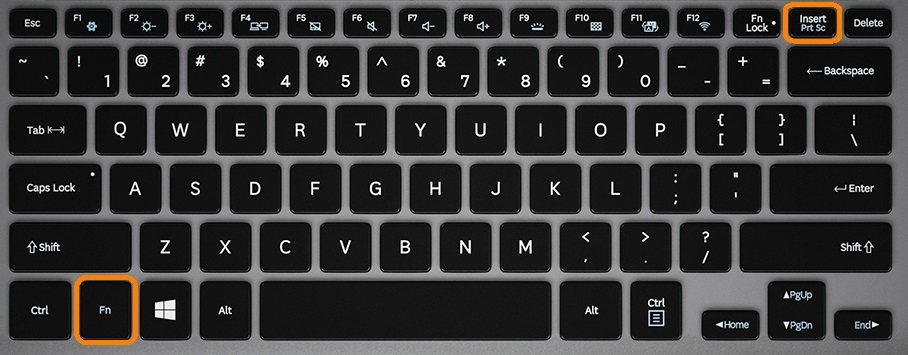
The most used option for capturing the screen status on any laptop is the Print Screen key (abbreviated PrtSc).
To solve the problem, find the button and press it, in most cases, along with the Fn key.
Keyboard
The image is copied to the clipboard. Any graphics editor will save it to the hard drive, but we will stop at the built-in operating system.
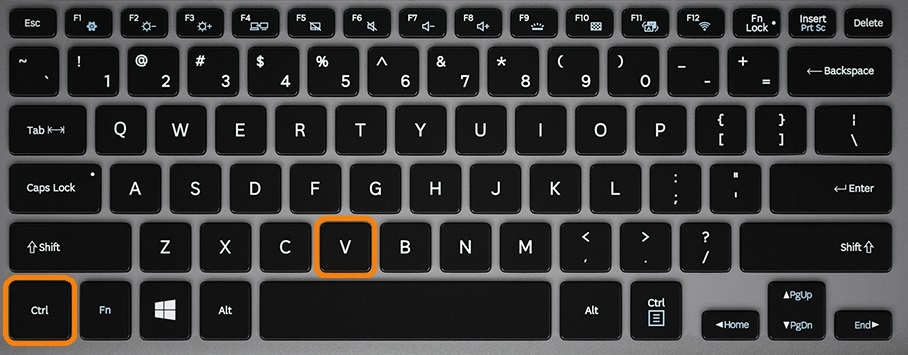
- If the snapshot needs to be inserted into a text document (doc), you can use Ctrl + V.
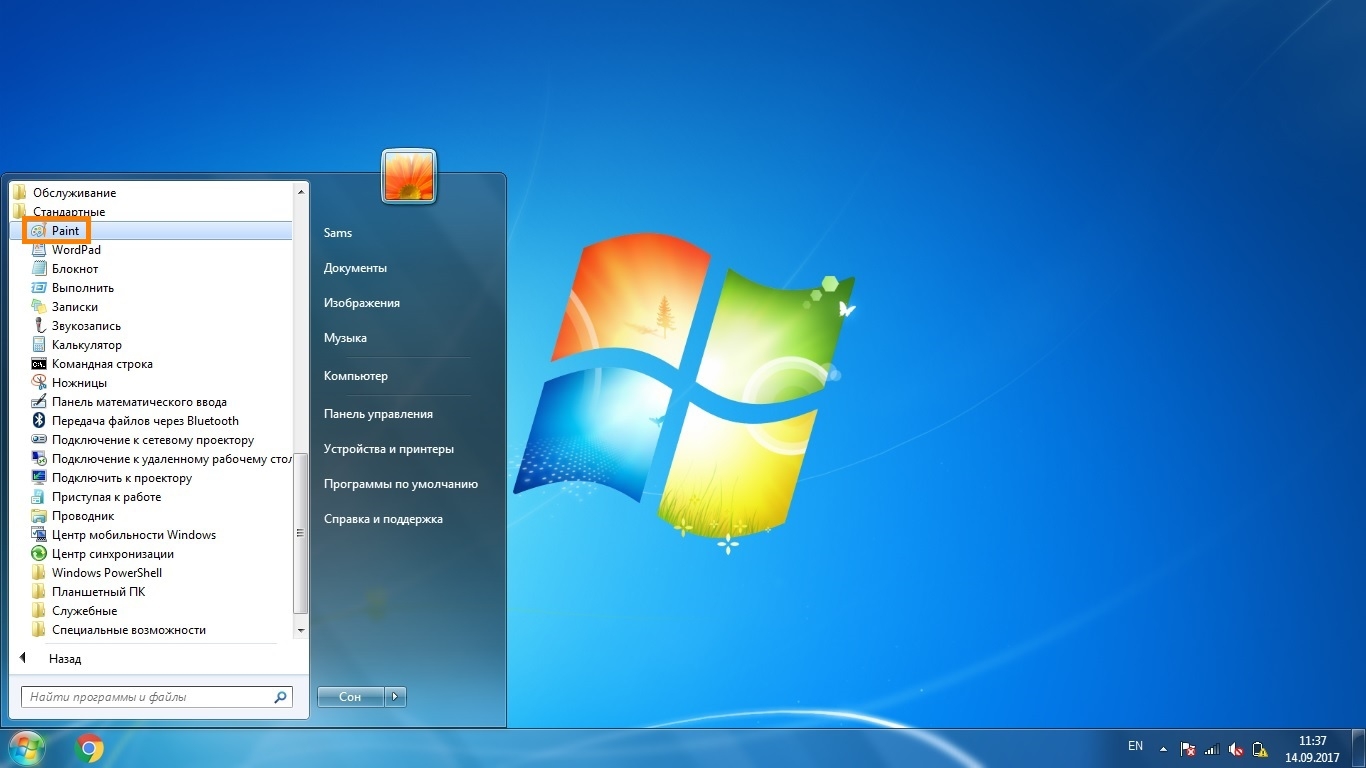
We launch the Paint program through the "Start": we expand the list of applications installed on the computer, go to the "Standard" and start the application.
Desktop
We simultaneously hold down the Ctrl + V buttons or call the “Paste” command through the “Edit” main menu item.
Paste from clipboard
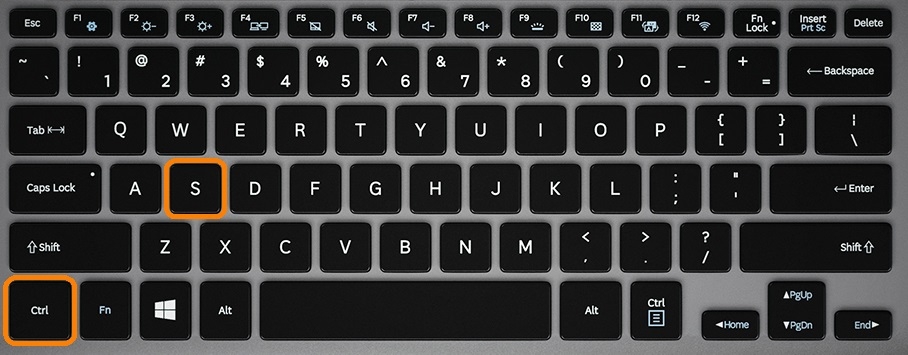
If necessary, crop the picture, make changes as far as the Paint functionality allows. To save a picture to a document, use the "Save" command. It is called up via the File menu (an alternative is to use the Ctrl + S buttons).
Preservation
Enter its name, determine the format (optimal is jpg) and specify the directory for storage.
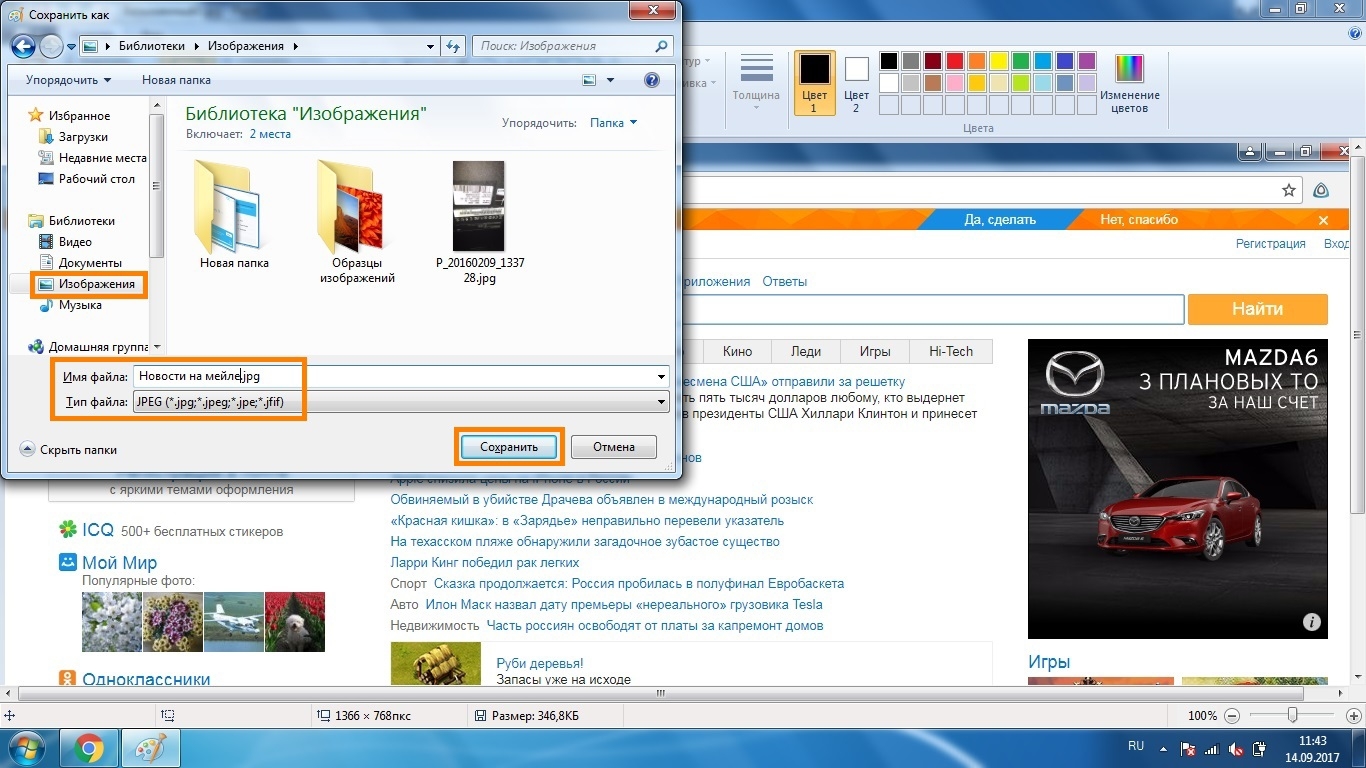
Save As Window
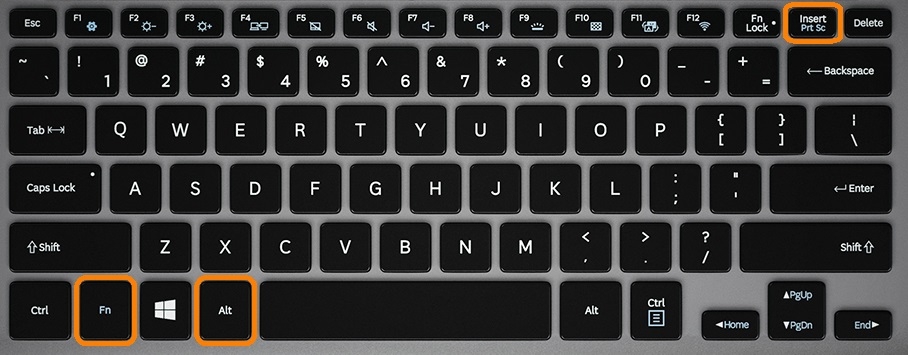
Win + Print Screen
In Windows 10, there are functions for working with screenshots, for example, auto-save screen photos to a file. The Win + PrtSc key combination is intended for this (on laptops, Fn is added to them). After pressing the keys, the picture will fade.
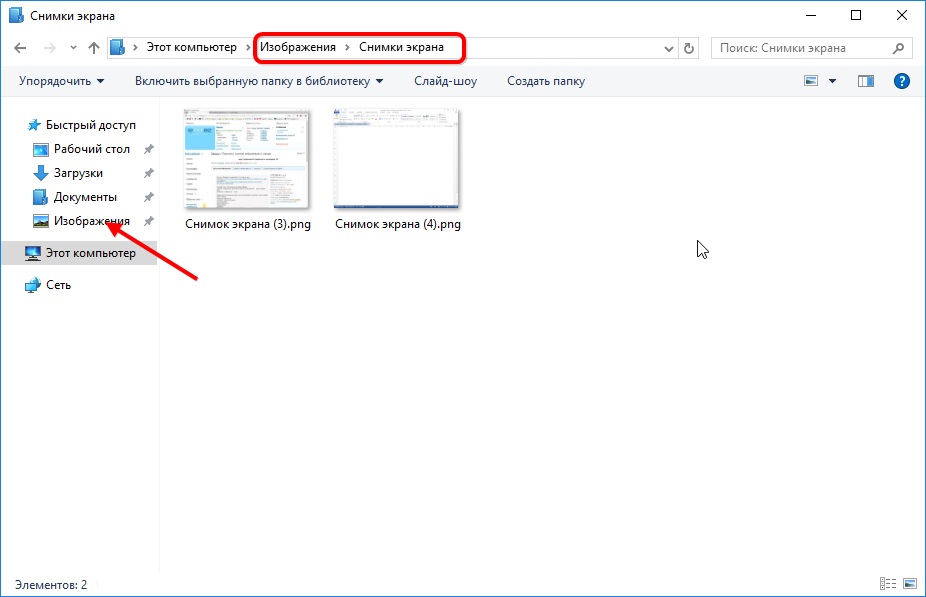
Catalog "Images"
Files are placed in the “Images ...” directory in the image library. For an instant transition to it, we use the combination Win + E and follow the path “Images” - “Images ...”.
Alt + Print Screen
Capturing the window where the focus is located will perform a combination of Fn + Alt + PrtSc, but only in the "Ten." In Windows 7, it is better to resort to the help of third-party software, which is much simpler than cropping each image manually.
To capture the active window into the buffer, the combination Fn + Alt + PrtSc is used. The image is also saved to the hard drive through Paint.
Keyboard
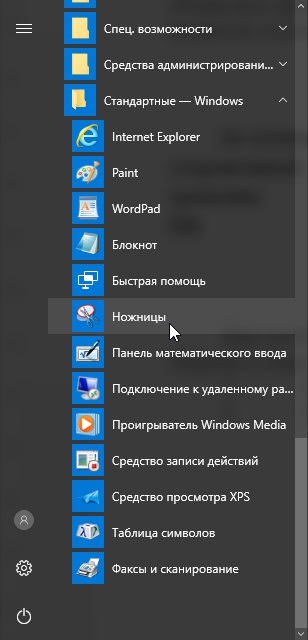
Scissors
The utility makes screenshots of areas with complex geometry.
- We call it through the "Start" (Standard directory).
Launching the Scissors program
- We set the parameters: the delay, if any, the affected area.
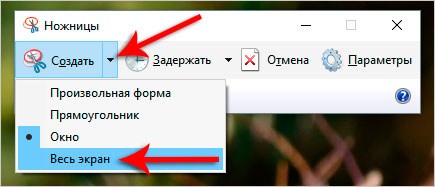
Capture shape
- Select an area (if this is not the last option), add accents and other elements if necessary.

Capture area
- If necessary, make minor adjustments using the built-in tools and save the contents of the window to a file using Ctrl + S.

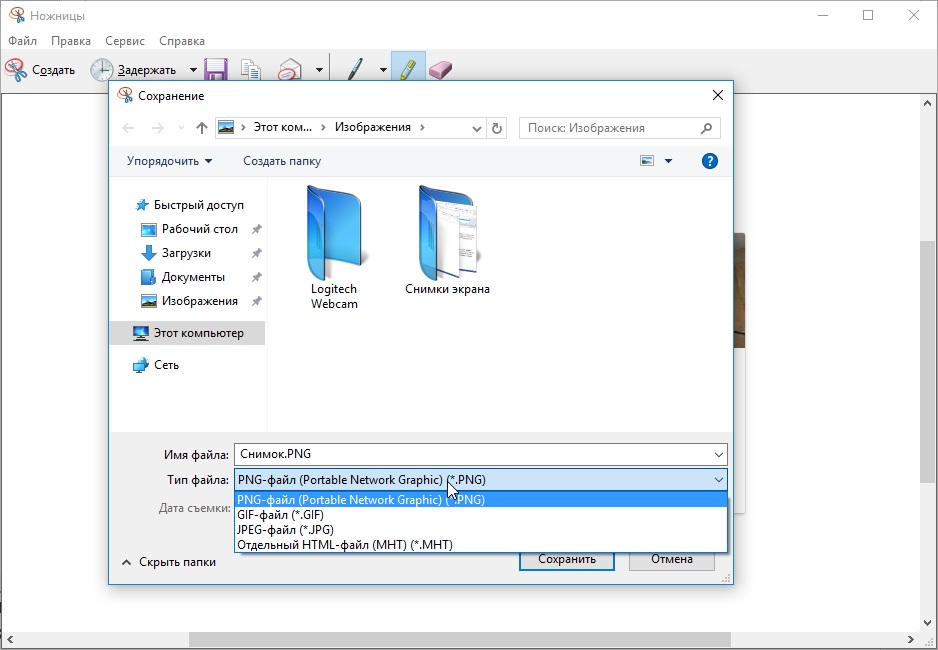
Save dialog
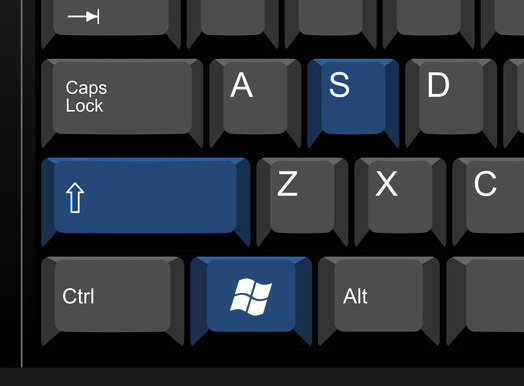
Win + Shift + S
Since 2017, Windows 10 has integrated the tool for obtaining clippings - screenshots of the selected area without reference to their contents. We simultaneously hold down the Win + Shift + S keys, and after the cross appears with the mouse, we mark the boundaries for capture.
Keys for creating clippings
The snapshot will be moved to the buffer, it will be saved to the hard drive as previously discussed through Paint or inserted into the document.
Knowing how to make a screen screen on a laptop built-in to the OS means it is not necessary to resort to the help of third-party software, but you can’t do without it to get great opportunities.